Upgrade zGateway Cluster
To upgrade zGateway cluster, follow these main steps:
1. Upgrade the zGateway Standby Cluster Manger Node
2. Upgrade the Dedicated zGateway Node First
3. Upgrade the zGateway Active Cluster Manager Node
Here are the downtime scenarios to consider
| Upgrading Dedicated zGateway Node | Load on zGateway node is disrupted. Load is shared by other zGateway nodes in the cluster. Cluster status is unaffected. | Users’ active connection to this zGateway node will be disconnected. Users do not have to re-authenticate. |
| Upgrade zGateway Standby Node | Cluster status is unaffected. If zGateway is active on this node. this load will be disrupted. Load is shared by other zGateway nodes in the cluster. | Users’ active connection to this zGateway node will be disconnected. Users do not have to re-authenticate. |
| Upgrade zGateway Active Node | Cluster failover will happen. Temporary delay in routing connection from currect active to standby. Standby node will become Active. If zGateway is active on this node, this load will be disrupted. Load is shared by other zGateway nodes in the cluster. |
Users’ active connection to this zGateway node will be disconnected. New user sessions will become invalid and will be required to login again. Any configuration changes done on zGateway Active node will not be preserved. |
It is recommended to keep a downtime of 30 minutes per gateway node in the cluster. If there are 3 nodes, it is recommended to take 1.5 hours of downtime.
UPGRADING DEDICATED ZGATEWAY NODE:
4. Connect to Dedicated zGateway as Security Officer.
Note: Do not connect using Virtual IP Address
5. Open management console and make sure you are connected to the dedicated zGateway node that you intend to upgrade.
6. Go to “HA Configuration” page and put the zGateway node in maintenance mode by clicking on “Enable Maintenance Mode”
Note: After this step, this gateway node will become inactive cluster node.
7. Go to “zGateway State” page under “ZGATEWAYSTATUS” section and put the zGateway in “Configuration Mode”.
Note: after this step, all active user connections to this gateway node will be disconnected.
8. Go to “Upgrade Firmware” page under “Host Maintenance” Section and upload the zGateway Upgrade patch file.
9. It may take 10 minutes or more to upload the upgrade patch based on network bandwidth between your PC and Gateway.
10. Once the upgrade file is uploaded and upgrade patch is started, the message will be displayed on the browser. In some cases, the message may not come on the management console. Refresh the browser and see if the upgrade has completed.
Note: Upgrading the real server, upgrades only the binaries on the real server. It does not upgrade the binaries or make changes in configuration schema (if required) on other servers. The process also does not upgrade the database. In case there are configuration changes required for zGateway to work, it may not be possible to login into zGateway, until it has joined the cluster again.
11. Keep the gateway in configuration and maintenance mode.
Repeat above steps for all Dedicated zGateway nodes.
UPGRADING STANDBY ZGATEWAY CLUSTER MANAGER NODE:
1. Connect to Standby zGateway Cluster Manager node as Security Officer.
Note: Do not connect using Virtual IP Address
2. Open management console and make sure you are connected to the Standby zGateway Cluster Manager node that you intend to upgrade.
3. Go to “HA Configuration” page and put the zGateway node in maintenance mode by clicking on “Enable Maintenance Mode”
Note: After this step, this gateway node will stop being part of the cluster and it will not show any cluster related status.
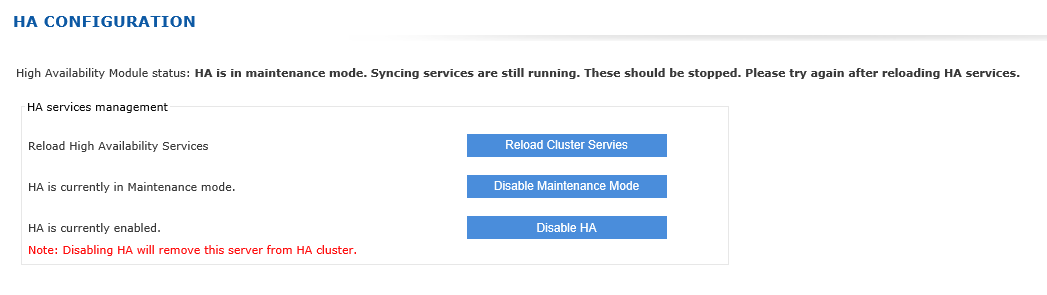
4. Please make the status for “High Availability Module Status” changes from “All services RUNNING” to “HA is in maintenance mode. All syncing services stopped properly. Maintenance/Upgrade activity can be performed now.”. Please refresh the web page and wait till this message appear on screen.
5. Go to “zGateway State” page under “zGateway STATUS” section and put the zGateway in “Configuration Mode”.
Note: after this step, all active user connections to this gateway node will be disconnected.
6. Now go to “Upgrade Firmware” page under “Host Maintenance” Section and upload the zGateway Upgrade patch file.
7. It may take 10 minutes or more to upload the upgrade patch based on network bandwidth between your PC and Gateway.
8. Once the upgrade file is uploaded and upgrade patch is started, the message will be displayed on the browser. In some cases, the message may not come on the management console. Refresh the browser and see if the upgrade has completed.
Note: Upgrading the standby server upgrades the binaries on the standby server as well as upgrades the database on the local machine, The binaries on other servers and database on the active node is not upgraded. In case there are database schema configuration change in database, which are must for zGateway to work, it may not be possible to login into the Standby zGateway, until it becomes the active gateway.
9. If login into standby gateway is possible, Check the Gateway version on the dashboard to confirm that the upgrade has completed.
10. Keep the gateway in configuration and maintenance mode.
11. This node will be made active after moving the active node out of cluster and rebooting the active node.
BRING THE CLUSTER UP AGAIN:
1. Do the HA Failover
i. Connect to Active zGateway Cluster Manager node as Security Officer.
Note: Do not connect using Virtual IP Address
ii. Open management console and make sure you are connected to the Active zGateway Cluster Manager node.
iii. Go to “HA Configuration” page and put the zGateway node in “Maintenance Mode”
Note: After this step, this gateway node will stop being part of the cluster and none of the nodes in the cluster will show the status of cluster.
iv. Go to “zGateway State” page under “zGateway STATUS” section and put the zGateway in “Configuration Mode”.
v. Now disconnect the Active zGateway node from the network. You can also reboot/shutdown the zGateway from zGateway Management console or from zGateway OS Shell. This step enables standby gateway to take over the virtual IP address and become active node. It should take around 6 seconds for the standby to become active.
2. Make New Active Node ready
i. Connect to Standby zGateway Cluster Manager node as Security Officer.
Note: If you are connecting using Virtual IP address, confirm that it is getting connected to the standby server (which should have switched by now to Active mode)
ii. Open management console and Go to “zGateway State” page under “ZGATEWAY STATUS” section and put the zGateway in “Run Mode”.
iii. Go to “HA Configuration” page and disable the Maintenance mode.
iv. On the same page, confirm that all services status is shown as OK.
3. Make Dedicated Gateways join cluster again and ready to accept connections
i. Now login into each Dedicated zGateway Node as Security Officer
ii. Go to “HA Configuration” page and disable the Maintenance mode.
iii. On the same page, confirm that all services status is shown as OK.
iv. Repeat above steps for each zGateway nodes.
v. The cluster should be up now.
UPGRADING OLD (LAST) ACTIVE ZGATEWAY CLUSTER MANAGER NODE:
1. Connect to last Active zGateway Cluster Manager node as Security Officer.
Note: Do not connect using Virtual IP Address
2. This node is already out of cluster and must be in maintenance mode (on HA page) and Configuration state (on zGateway Status page).
3. Now go to “Upgrade Firmware” page under “Host Maintenance” Section and upload the zGateway Upgrade patch file.
4. It may take 10 minutes or more to upload the upgrade patch based on network bandwidth between your PC and Gateway.
5. Once the upgrade file is uploaded and upgrade patch is started, the message will be displayed on the browser. In some cases, the message may not come on the management console. Refresh the browser and see if the upgrade has completed.
6. Check the Gateway version on the dashboard to confirm that the upgrade has completed.
7. Go to “HA Configuration” page and disable the Maintenance mode.
8. On the same page, confirm that all services status is shown as OK.
Note: After above step, this node should become the standby node in the cluster and status of full cluster should be visible on the dashboard.
9. Ensure that the node has joined the cluster as standby