zPortal Quick Configuration Guide
With the installation of zPortal and/or zGateway completed, you can follow the simplified steps below to configure and deploy your digital workspace solution. For a more detailed description of each subsection of the UI, read the built-in tool tips or use or search engine on the AmZetta Knowledge base for more details.
zPortal:
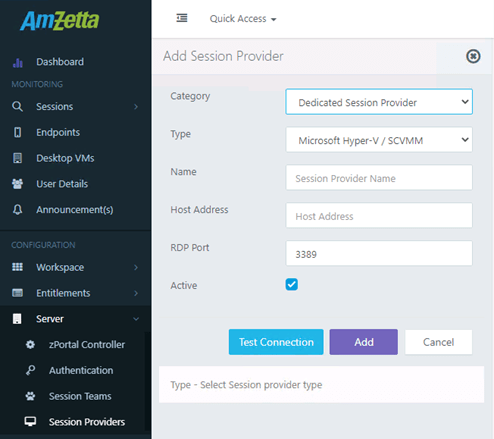
- Select [Server > Session Providers] and add a Hypervisor to allow zPortal to identify potential templates and create new virtual desktops.
a. Select the category and choose the type of hypervisor applicable to your environment. For RDS and/or delivering applications, the Shared Session or select a Dedicated Session to deliver dedicated virtual desktops to end users.
b. Provide a reference name to associate with this Session Provider in the zPortal management UI.
c. Add the Host Address, as either the IP or Host Name.
d. Test the connection and Add once successful.
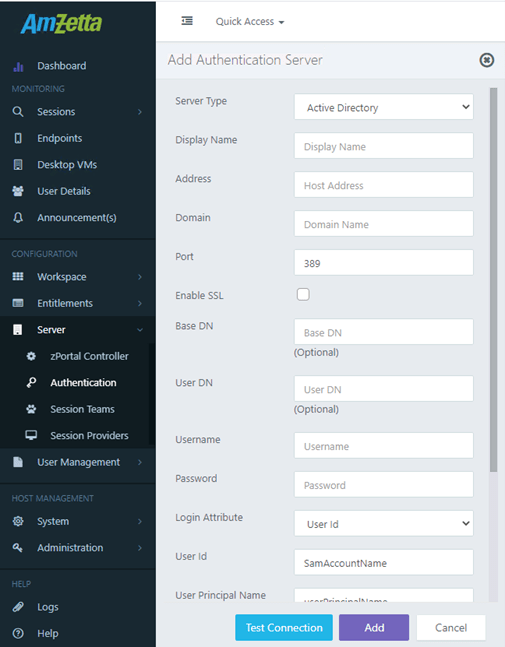
2. Select [Server > Authentication] to add your Active Directory to assign user to virtual desktops and applications.
a. Your FQDN or IP address of the directory server will be required for the Domain Name.
b. Administrative credentials will be required to configure the authentication server.
c. Tool Tips are offered by hovering over each field.
3. Select [Workspace > Organizations] and add Authentication Server for your organization and domain. By default, zPortal uses built-in functionality to authenticate users. Many of the settings here can be customized to provide a more personalized look and feel for your users.
a. Select the Default Organization and select Edit.
b. Select the “Authentication Domain” tab to set both your authentication server and authorization server.

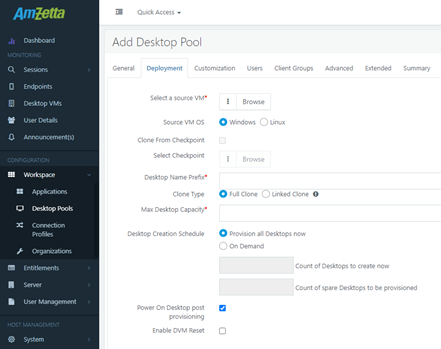
4. Select [Workspace > Desktop Pools] and add new virtual desktops from an existing template in your hypervisor.
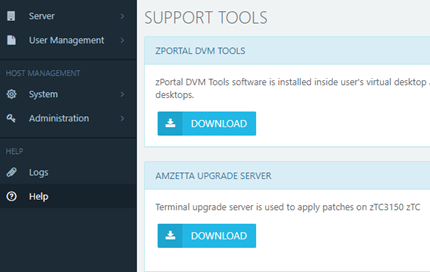
a. Templates used by zPortal will require the “zPortal DVM Tools” to be applied to them to properly provision it for use. The “zPortal DVM Tools” can be downloaded from the Help tab.
b. For a quick deployment, select a user-based entitlement with persistent virtual desktops and Dynamic Provisioning. This will allow a template to be select from the new “Deployment” tab.
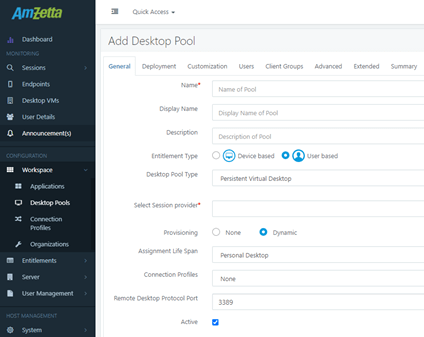
c. Select a source VM by clicking the Browse button. A list of available VMs from your hypervisor will be listed. Once done, provide a prefix to be applied to cloned VMs and the number of VMs you would like created from your source VM.
d. From the “Customization”, utilize the built-in system prep tool “zPreps”.
e. Select the “Join Domain” option under the “zPreps” field. This will allow you to automatically add your new virtual machines directly to the domain. As a best practice, each field under the “Join Domain” button should be filled. Tool tips are provided for each.

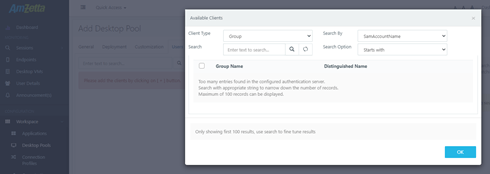
f. Apply users or groups from the “Users” tab to allow access to the configured virtual machines, ensuring that your selection is checked before proceeding.
g. The new virtual machines’ availability can be viewed under the [Desktop VMs] tab once provisioning is complete.
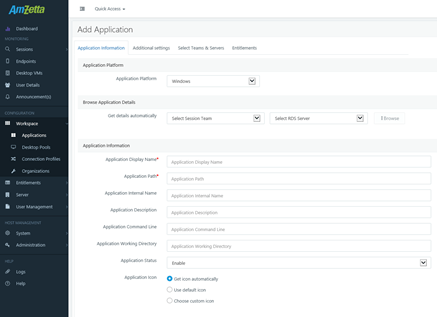
5. Select [Workspace > Applications] and add a virtual application for use by designating its install location.
a. Select the “Add” option and supply the name and installation path (most likely found under either C:\Program Files or C:\Program Files(x86)) where your desired application is installed. The application will need to end with either “.exe” or “.bat” as its file extension.
b. Entitlements can be applied to users or groups whom you wish to access and utilize the new application.
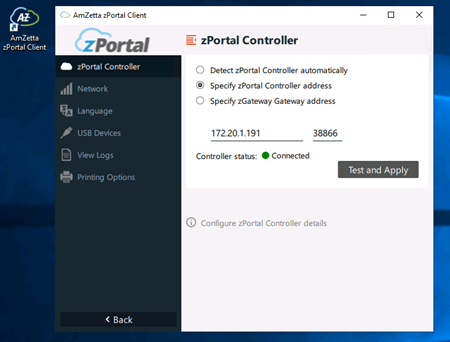
6. Download zPortal Client and set connection to the IP address used for the zPortal Management UI. Provide username and password for assigned user. The zPortal Client can be found on the AmZetta website at https://amzetta.com/zclient/ .
a. The IP/Hostname for the zPortal Controller can be added by selecting the gear icon in the bottom right corner.
b. A user will need to be assigned either a virtual desktop or virtual application to log in.
c. Once logged in, the end user will be presented with their assigned virtual desktops and virtual applications.
