How Can We Help?
How to Publish Applications
Prerequisites: For creating any new application for end users, it is necessary to have following pre-configurations to be done on zPortal Controller
-
- zPortal Session Host Server is already configured as Session Provider
Use the below steps to configure applications:
- Launch browser and open Primary zPortal Controller Management Console
- Login using Organization administrator credentials and selecting appropriate organization
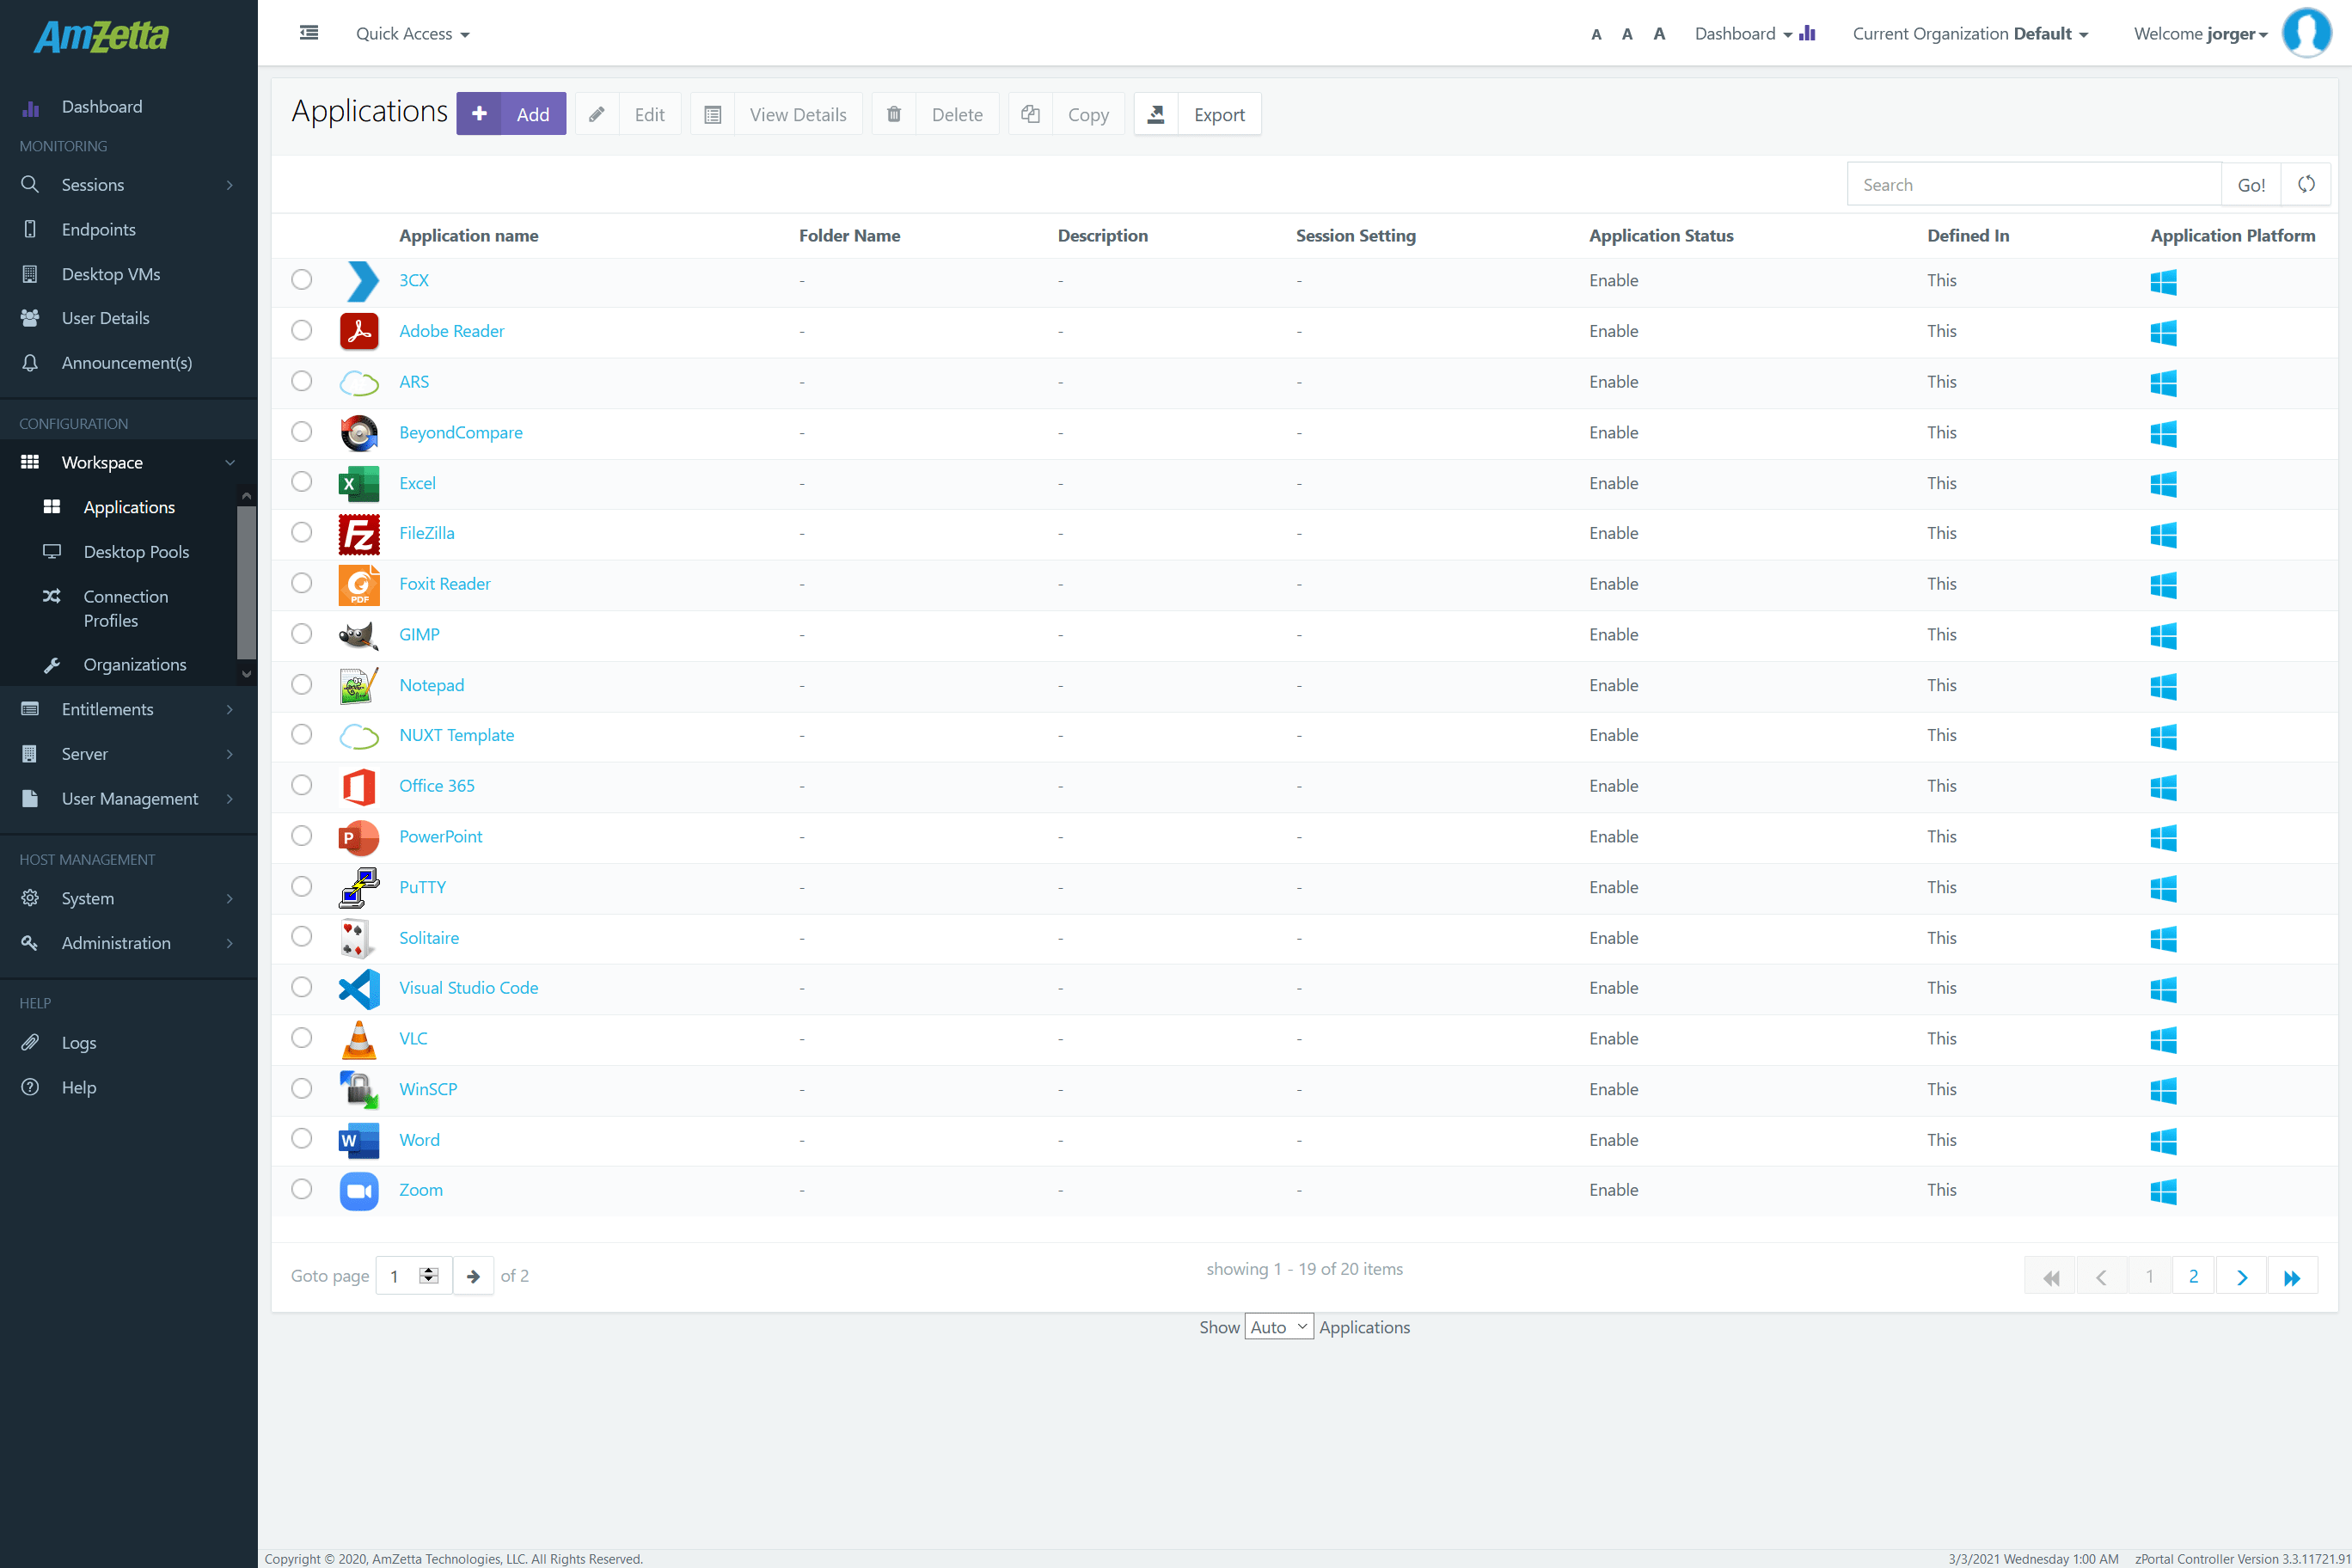
- Go to Configuration -> Workspace -> Applications section
- Click on Add ‘+’ button to invoke the Add Application wizard
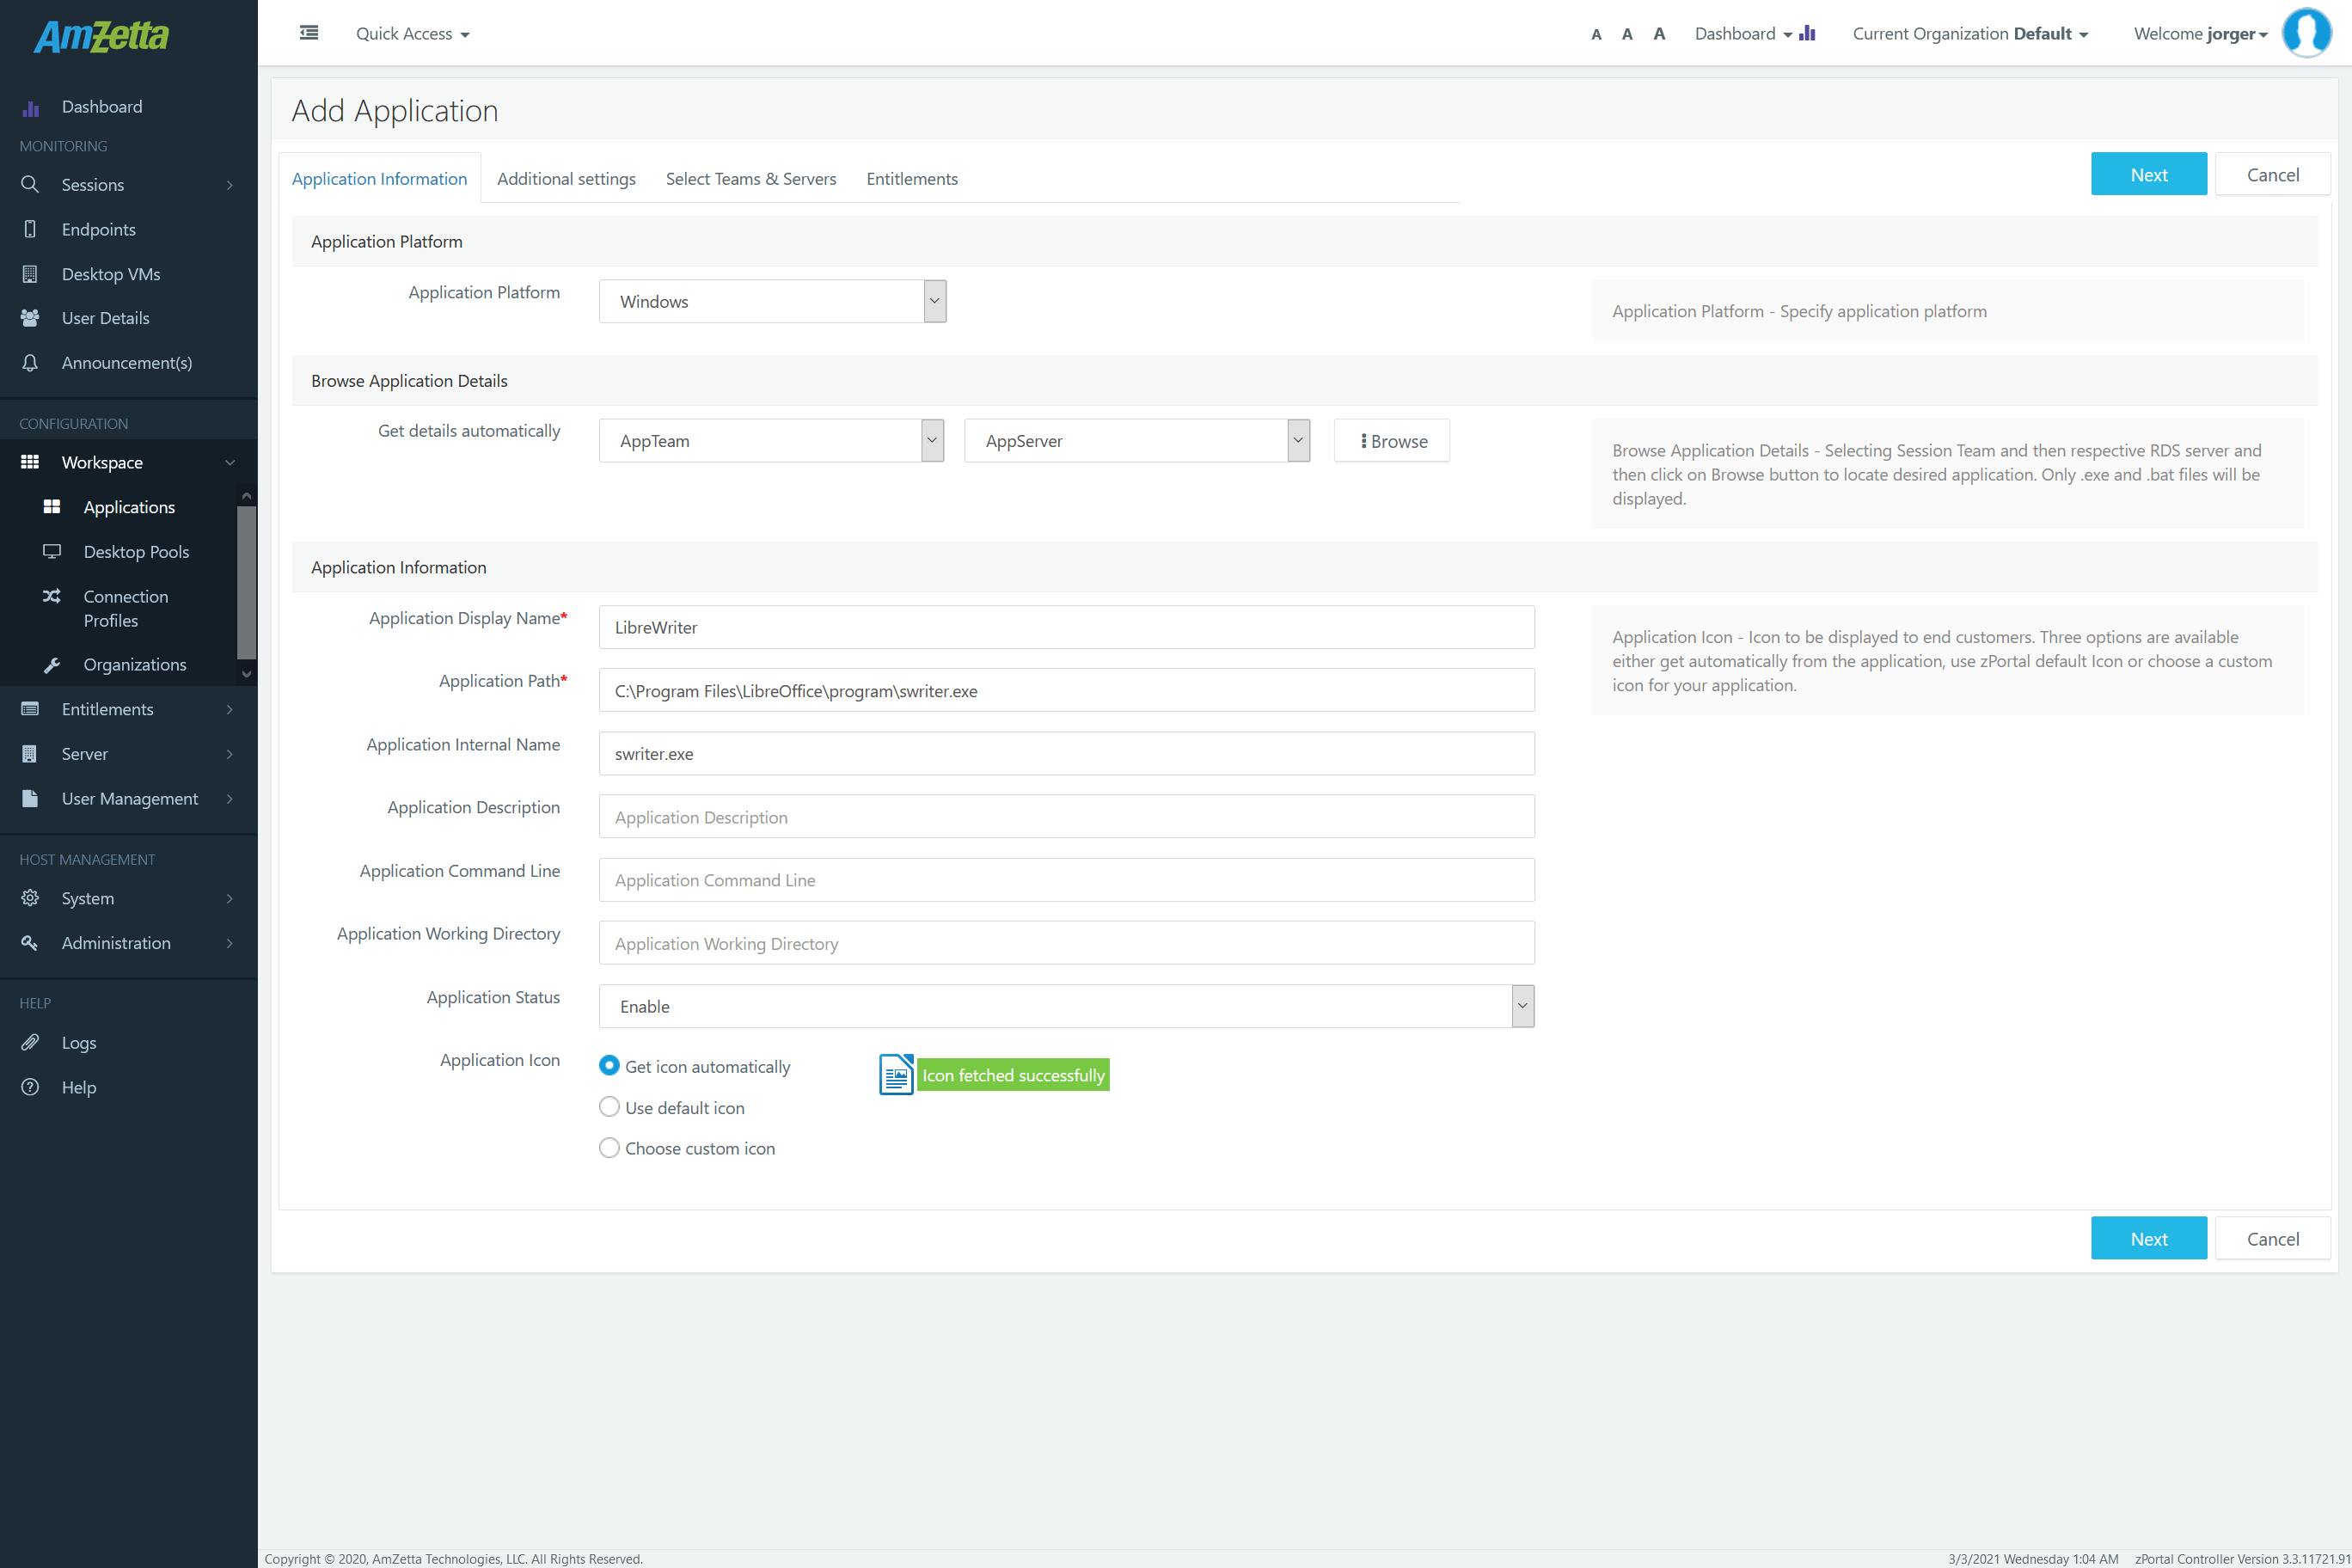
- In Add Application Wizard, first tab is Application Information. Provide the following details
- Application Display Name to be displayed to user *Mandatory Field
- Application Path: Full path of the application exe *Mandatory Field
- Application Internal Name: Actual internal name of the application *Mandatory Field
- Application Description: Optional description of the application
- Application Command Line: Optional command line parameter to be used while launching the application
- Application Status: Enabled/ Disabled, disabled applications are not shown to the users though assigned.
- Application Icon:
- Get Icon Automatically: To use icon fetched from application exe
- Use Default Icon: Use AmZetta zPortal Default Icon
- Use Custom Icon: To browser and fetch custom icon for the application
Note: -
- Application details (Full Path/ Internal Name and Icon) will be fetched automatically, when administrator will type the application exe path and will move to the next tab (using key entry Tab or by using Mouse click).
Administrator can also navigate to configured Session Host Server directory to browse and get the application details.
-
- Click on Next button to proceed to Additional Settings section
- In Additional Settings tab, following configurations can be done:
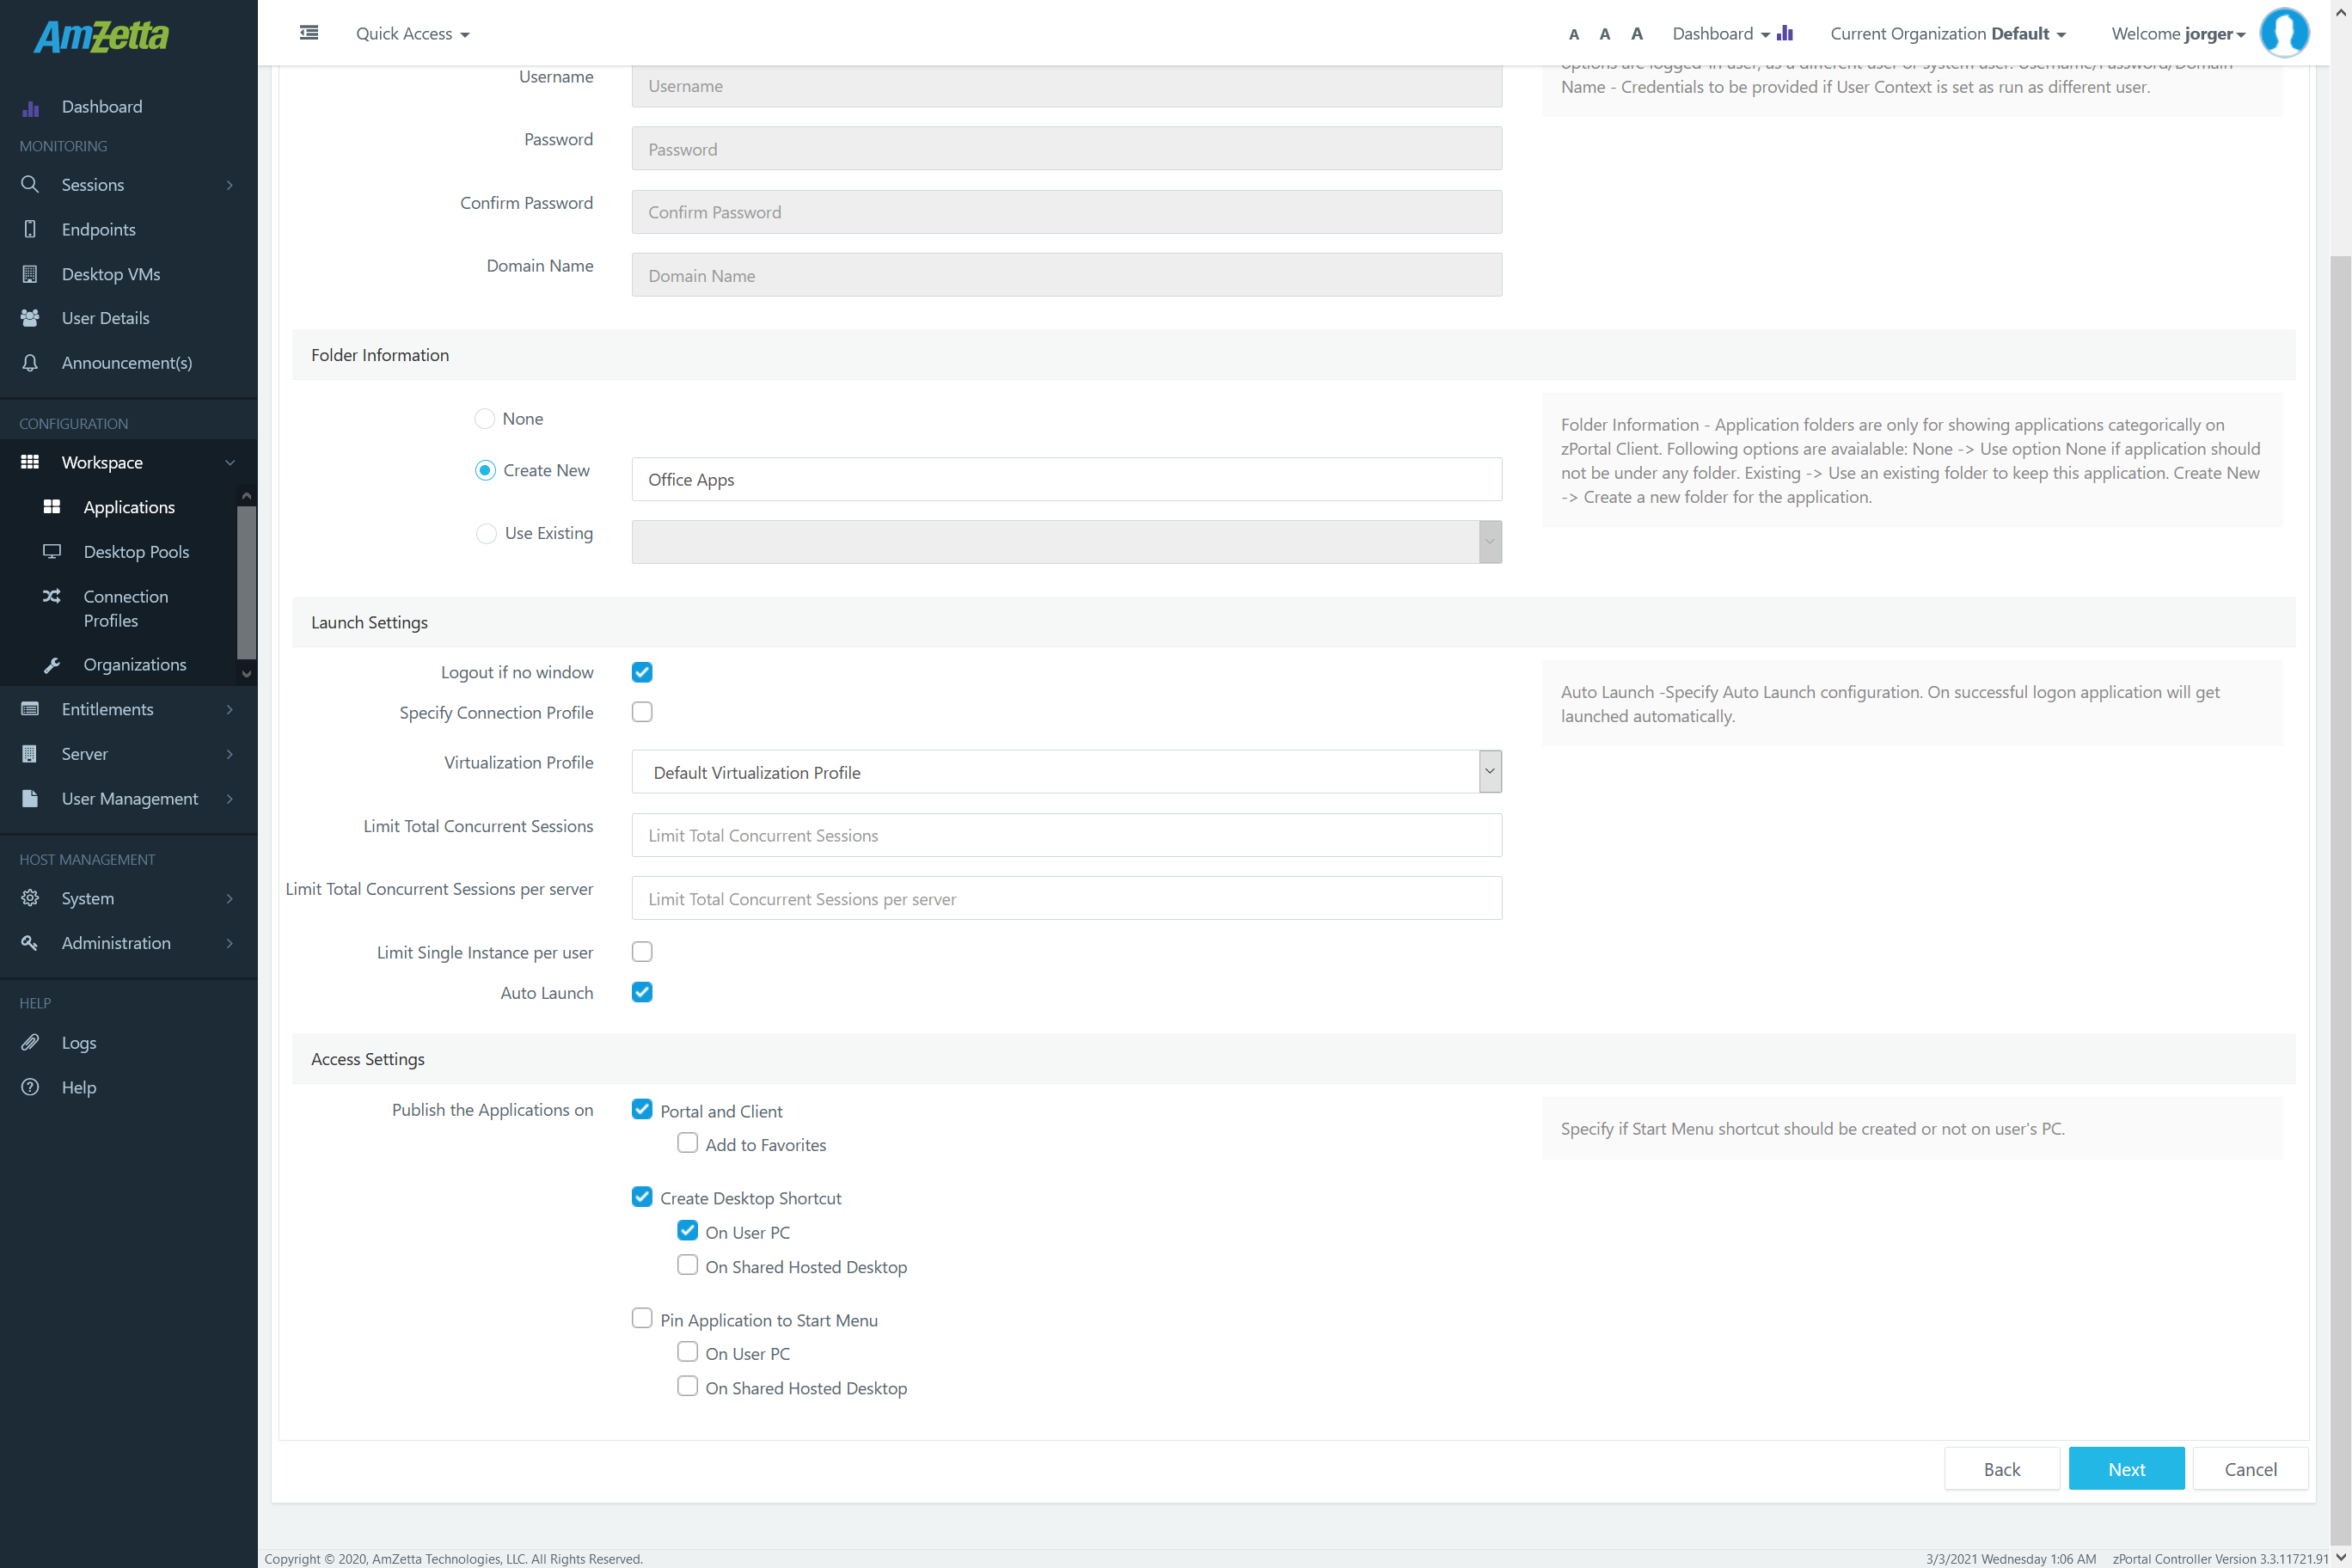
- Folder Information: Create a new folder or select an existing folder, under which the application will be displayed on client side.
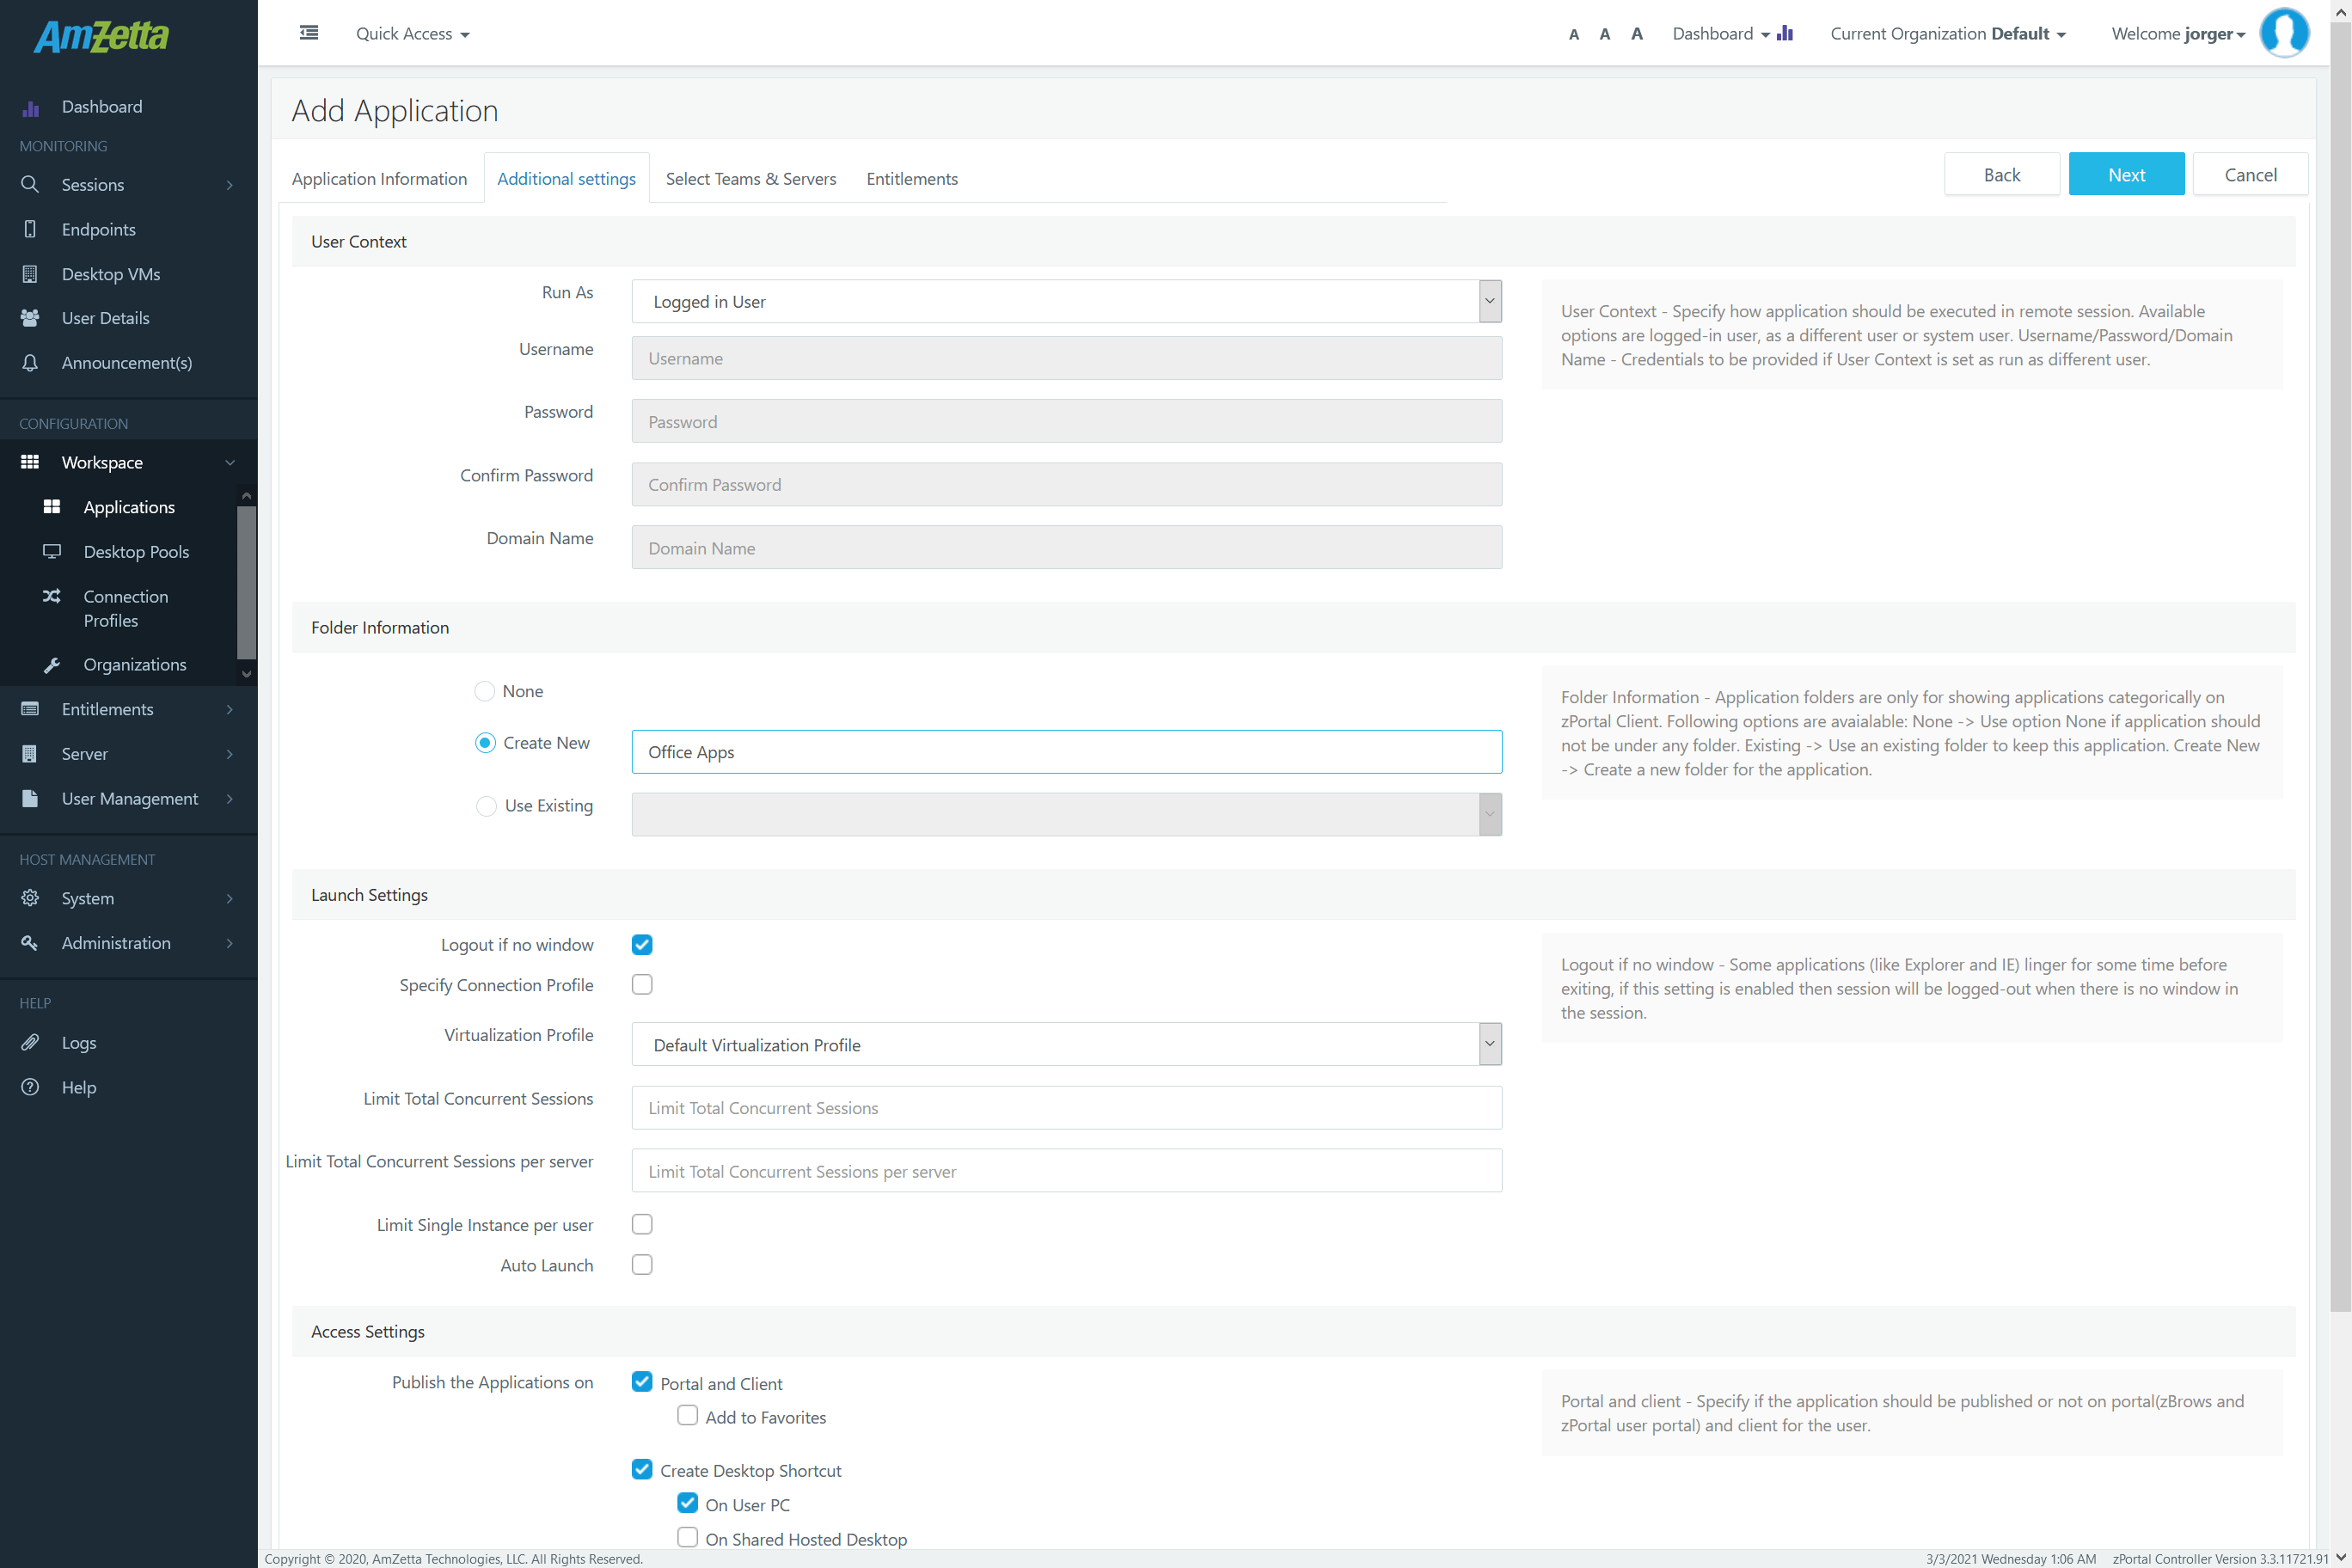
- Launch Settings: Following launch settings can be configured as per requirement
- Specify Connection Profile: To be configured if any specific connection profile must be used for application access. Please refer section, Application Specific Connection Profile for more details.
- Virtualization Profile: If this application should use any specific Virtualization profile to support Virtual IP.
- Limit Total Concurrent Sessions: Specify the total number of concurrent sessions to be allowed for the application.
- Limit Total Concurrent Sessions per server: Specify total number of concurrent sessions per server should be allowed.
- Limit Single Instance per user: Specify if only single instance of application should be allowed for one user. If checked, user will be able to access
- Auto Launch: If application should be auto-launched as soon as the user logs-in.
- Folder Information: Create a new folder or select an existing folder, under which the application will be displayed on client side.
- Click on Next button to proceed to Select Servers section
- In Select Servers section, select the servers from which the application can be published. The wizard by default verifies if published application is available or not on the defined path. If the application is not available on the provided path, Select Servers tab can be used to browse to the application directory as well.

- Click on Next button to proceed to Entitlements tab
- Entitlements tab can be used to modify the assignments of the applications to users, groups or OUs.
- To add new entitlements, click on Add button to open Available Clients dialog
- Search with appropriate string to get required users/ groups, OUs or Pools
- Select Users/ Groups/ OUs or Pools (User based)
- To remove existing entitlements, select the user/group/OU and click on button Remove
- Administrator can also search already added clients in the Entitlements tab of Application wizard
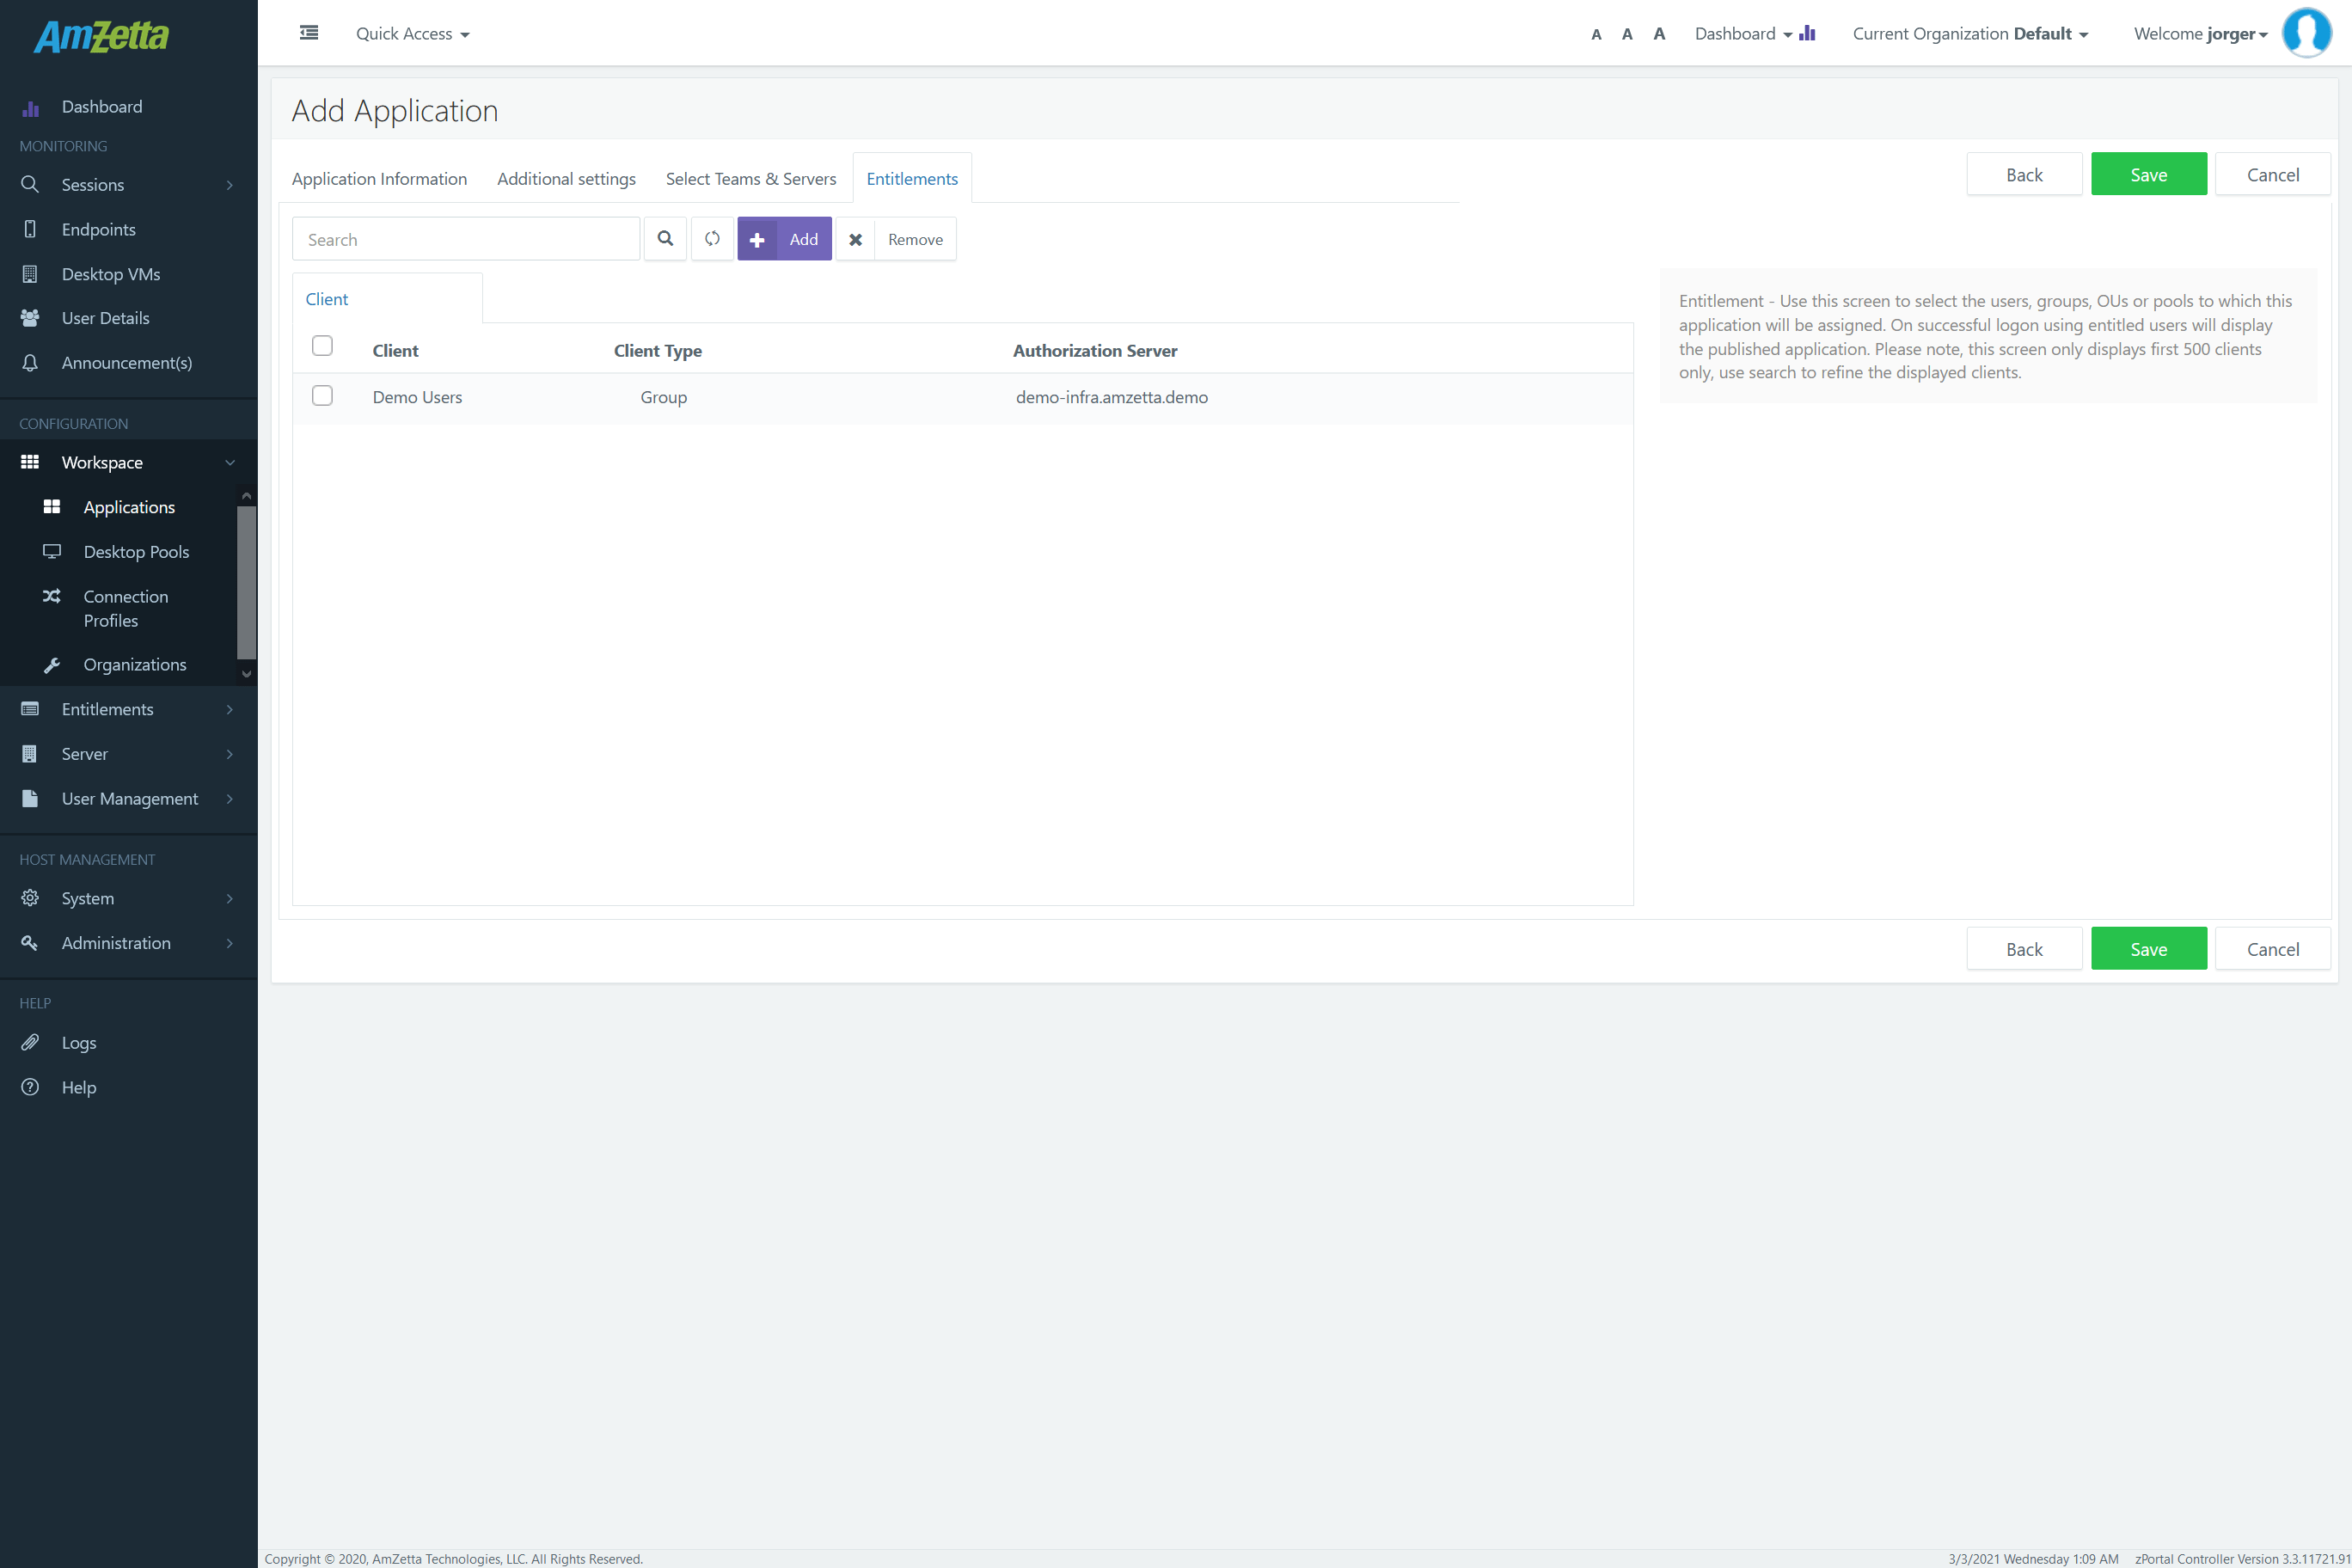
- To add new entitlements, click on Add button to open Available Clients dialog
- Click on Save button to complete the application creation process.
- Once application is saved, administrator will be navigated back to the Applications section and application will be listed.
- Use all the steps mentioned in this section to publish multiple applications to be used by end users.