Application Publishing Facts and Concepts
Browse Application in Session Host Server Directory
- Select Session Team using dropdown in Browse Application Details section
- Select RDS Server from next dropdown screen
- Click on Browse button to open File System dialog
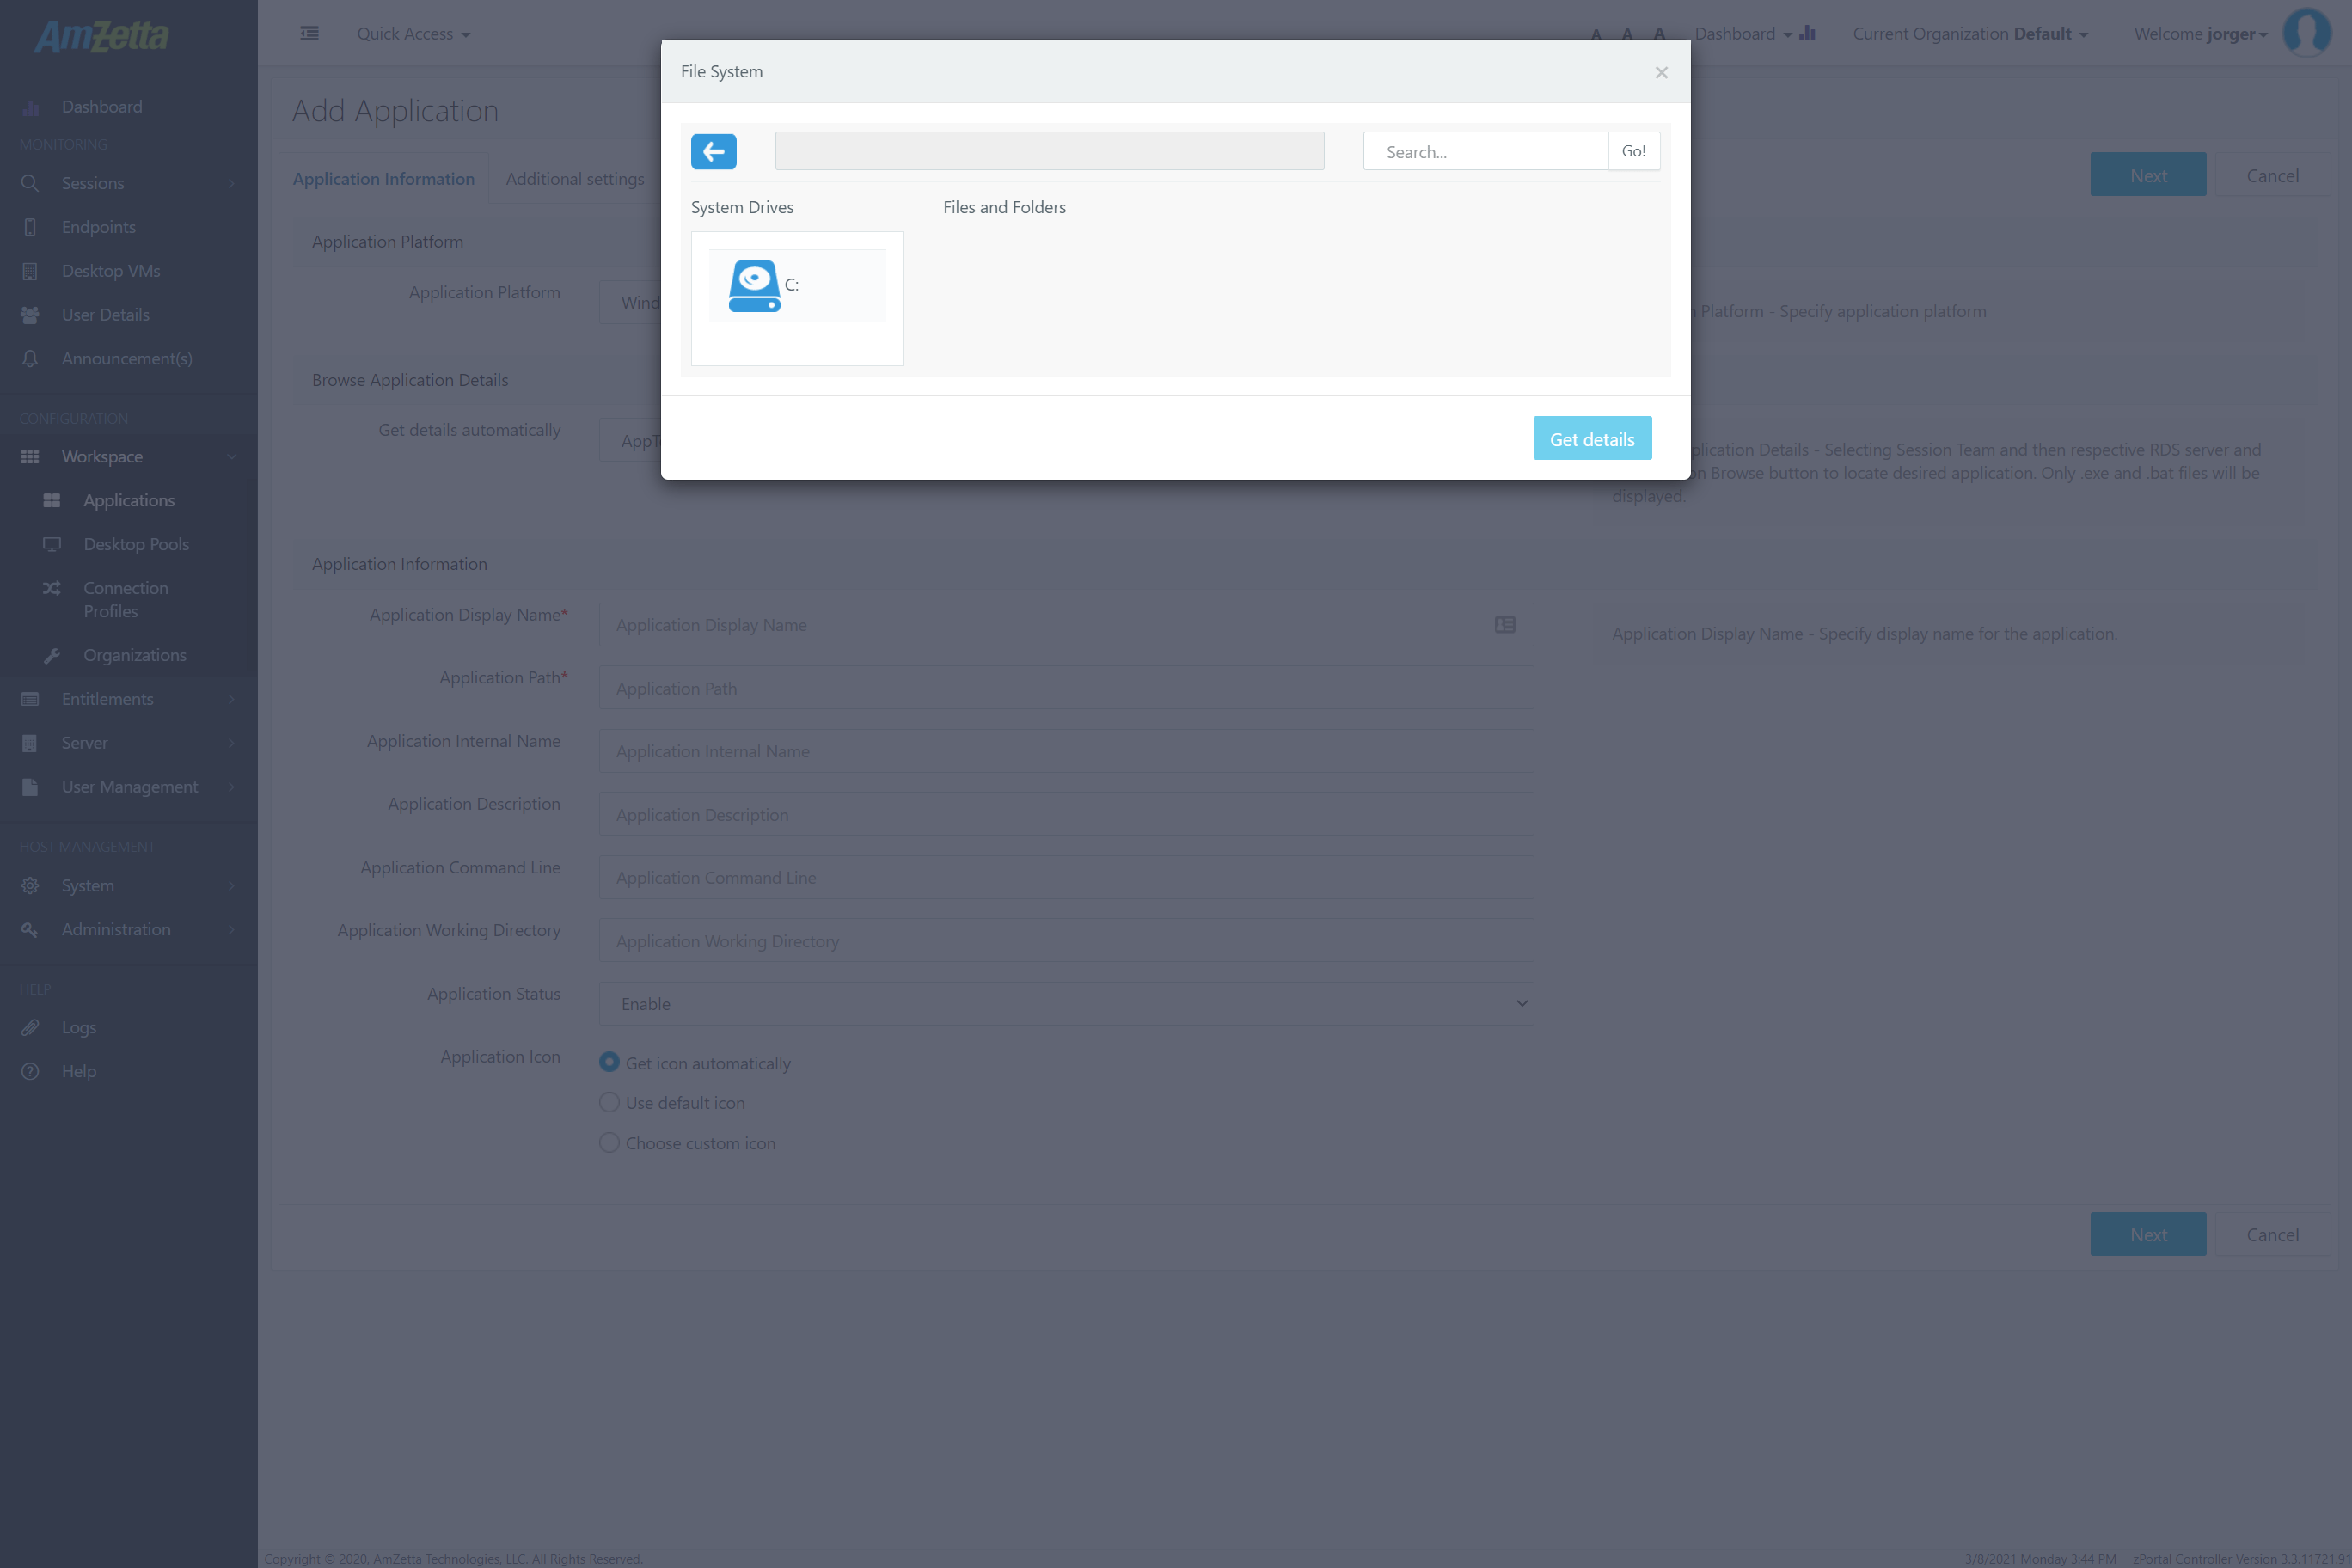
- In File System dialog, click on any displayed drive to navigate to application path
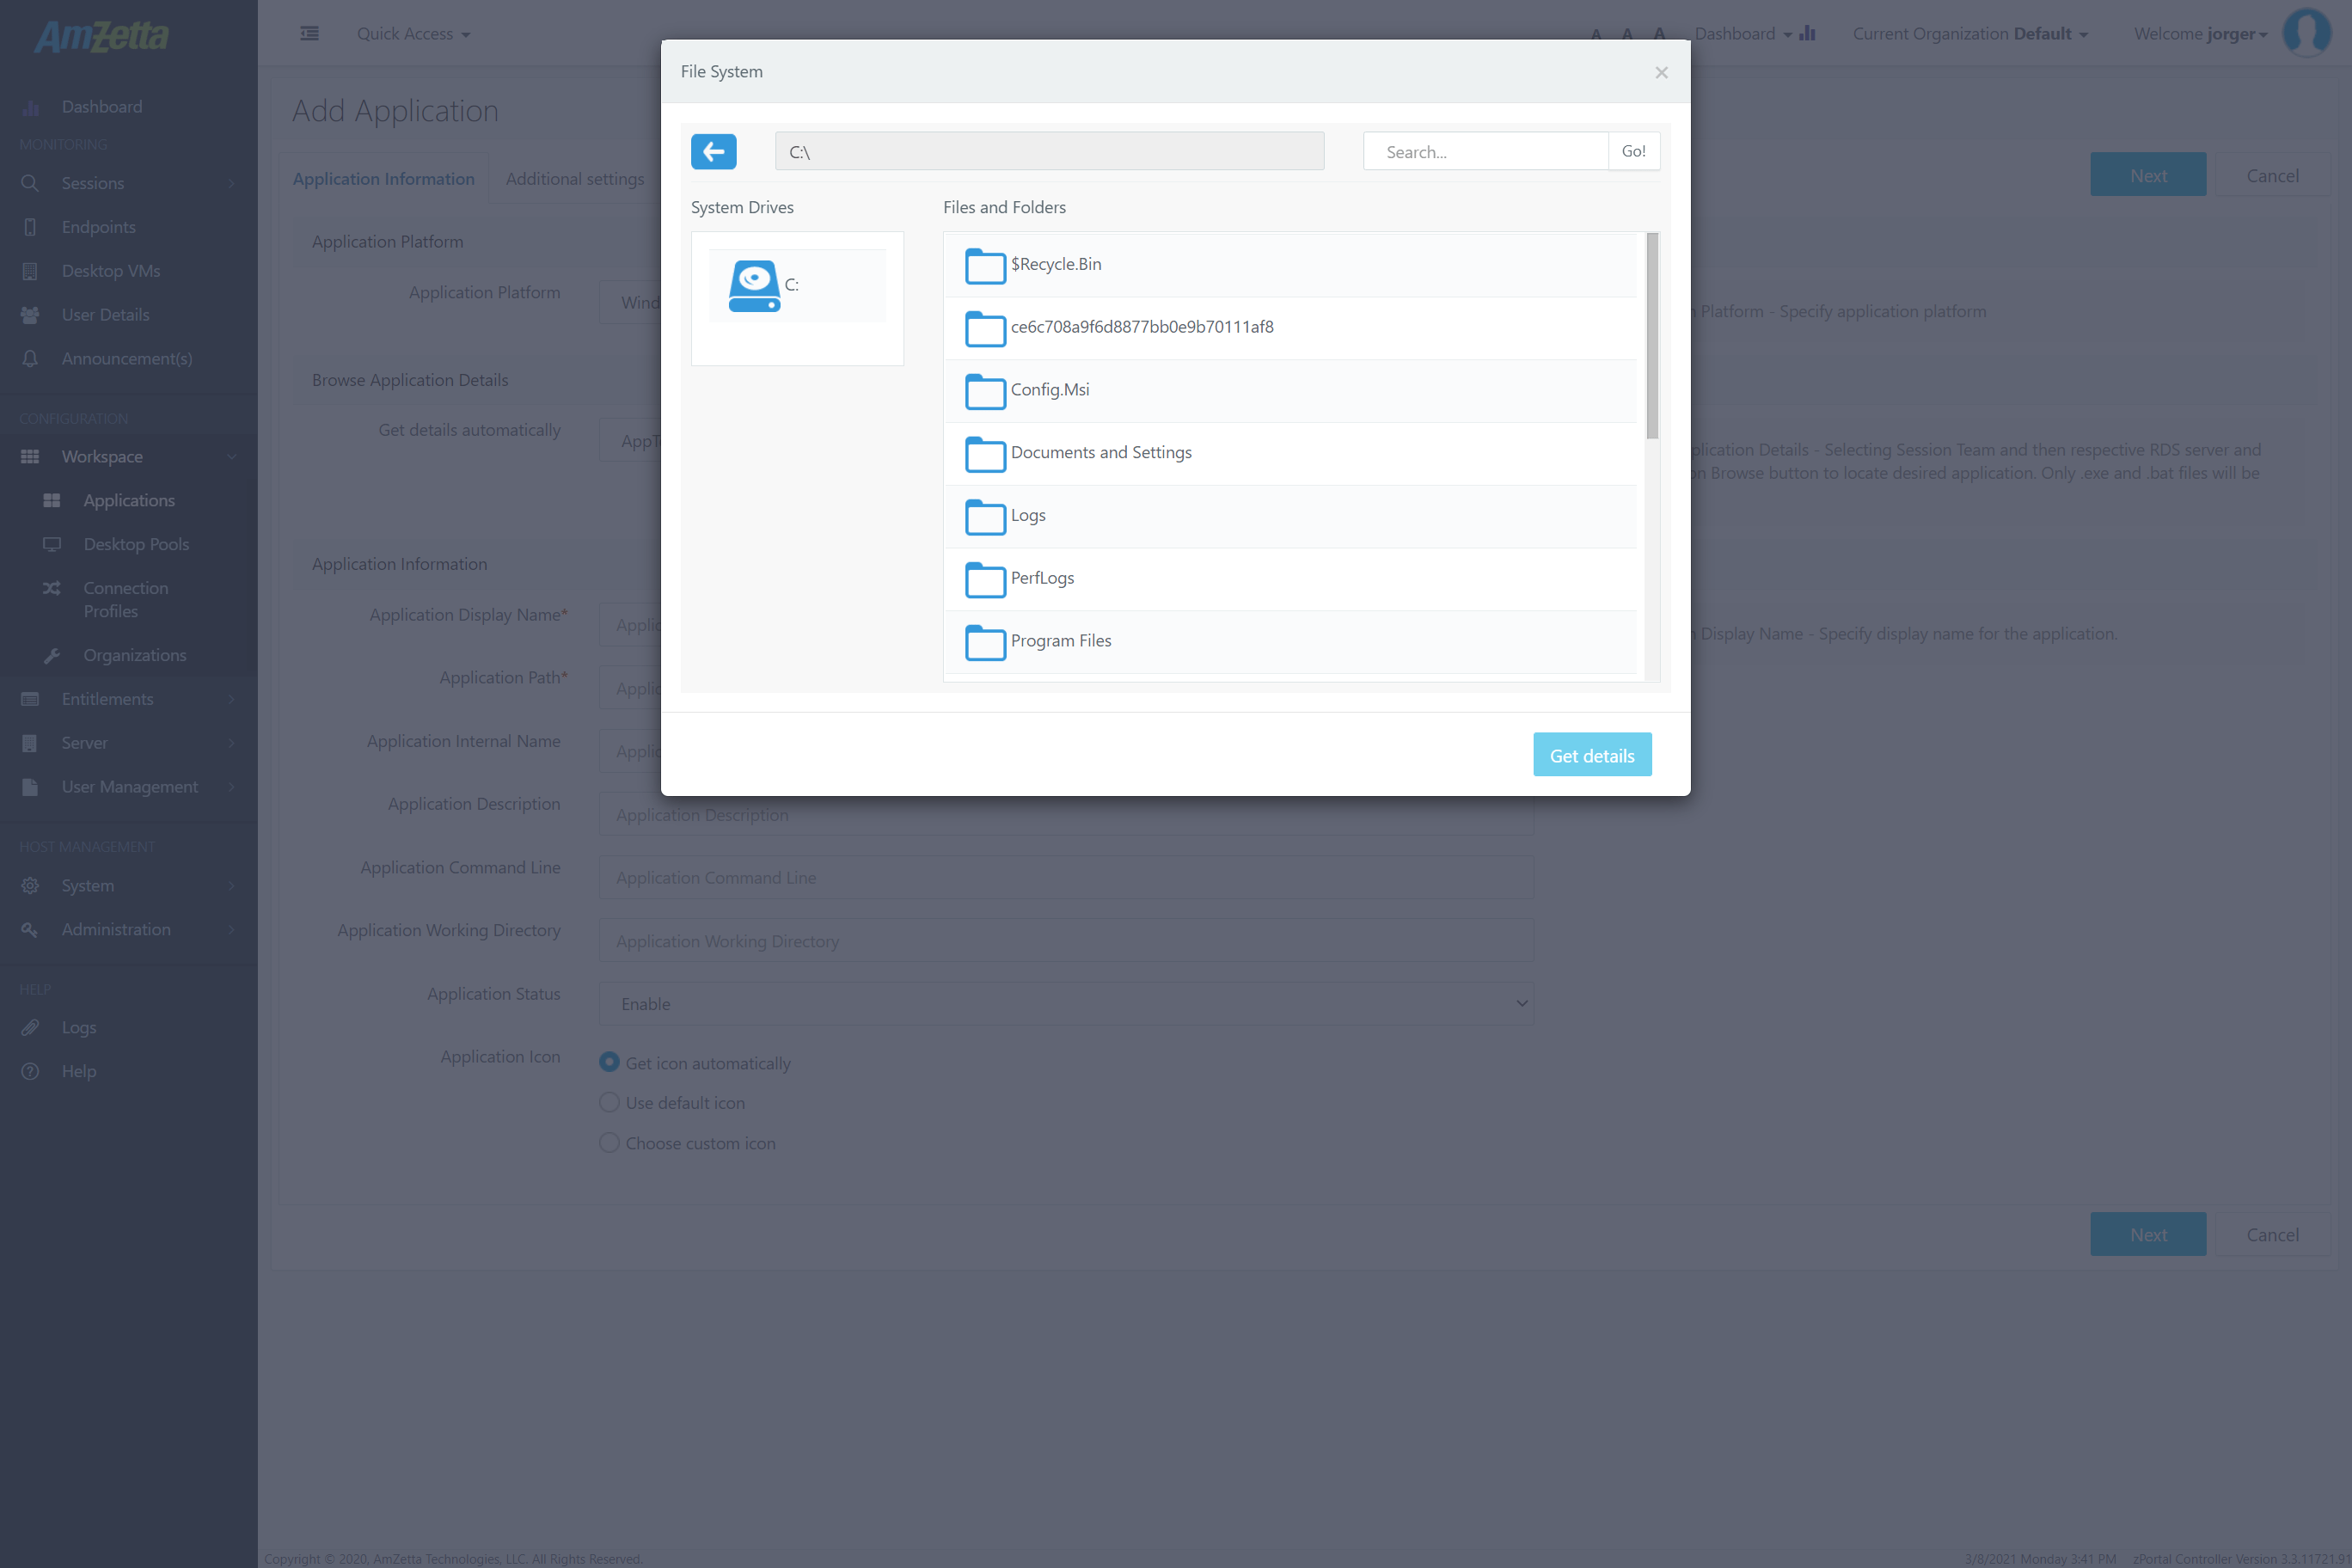
- Navigate to the folder where application exe can be found and select the application.exe (Google chrome application is selected in below image)
- It will automatically fetch the icon and will show success message in the same dialog
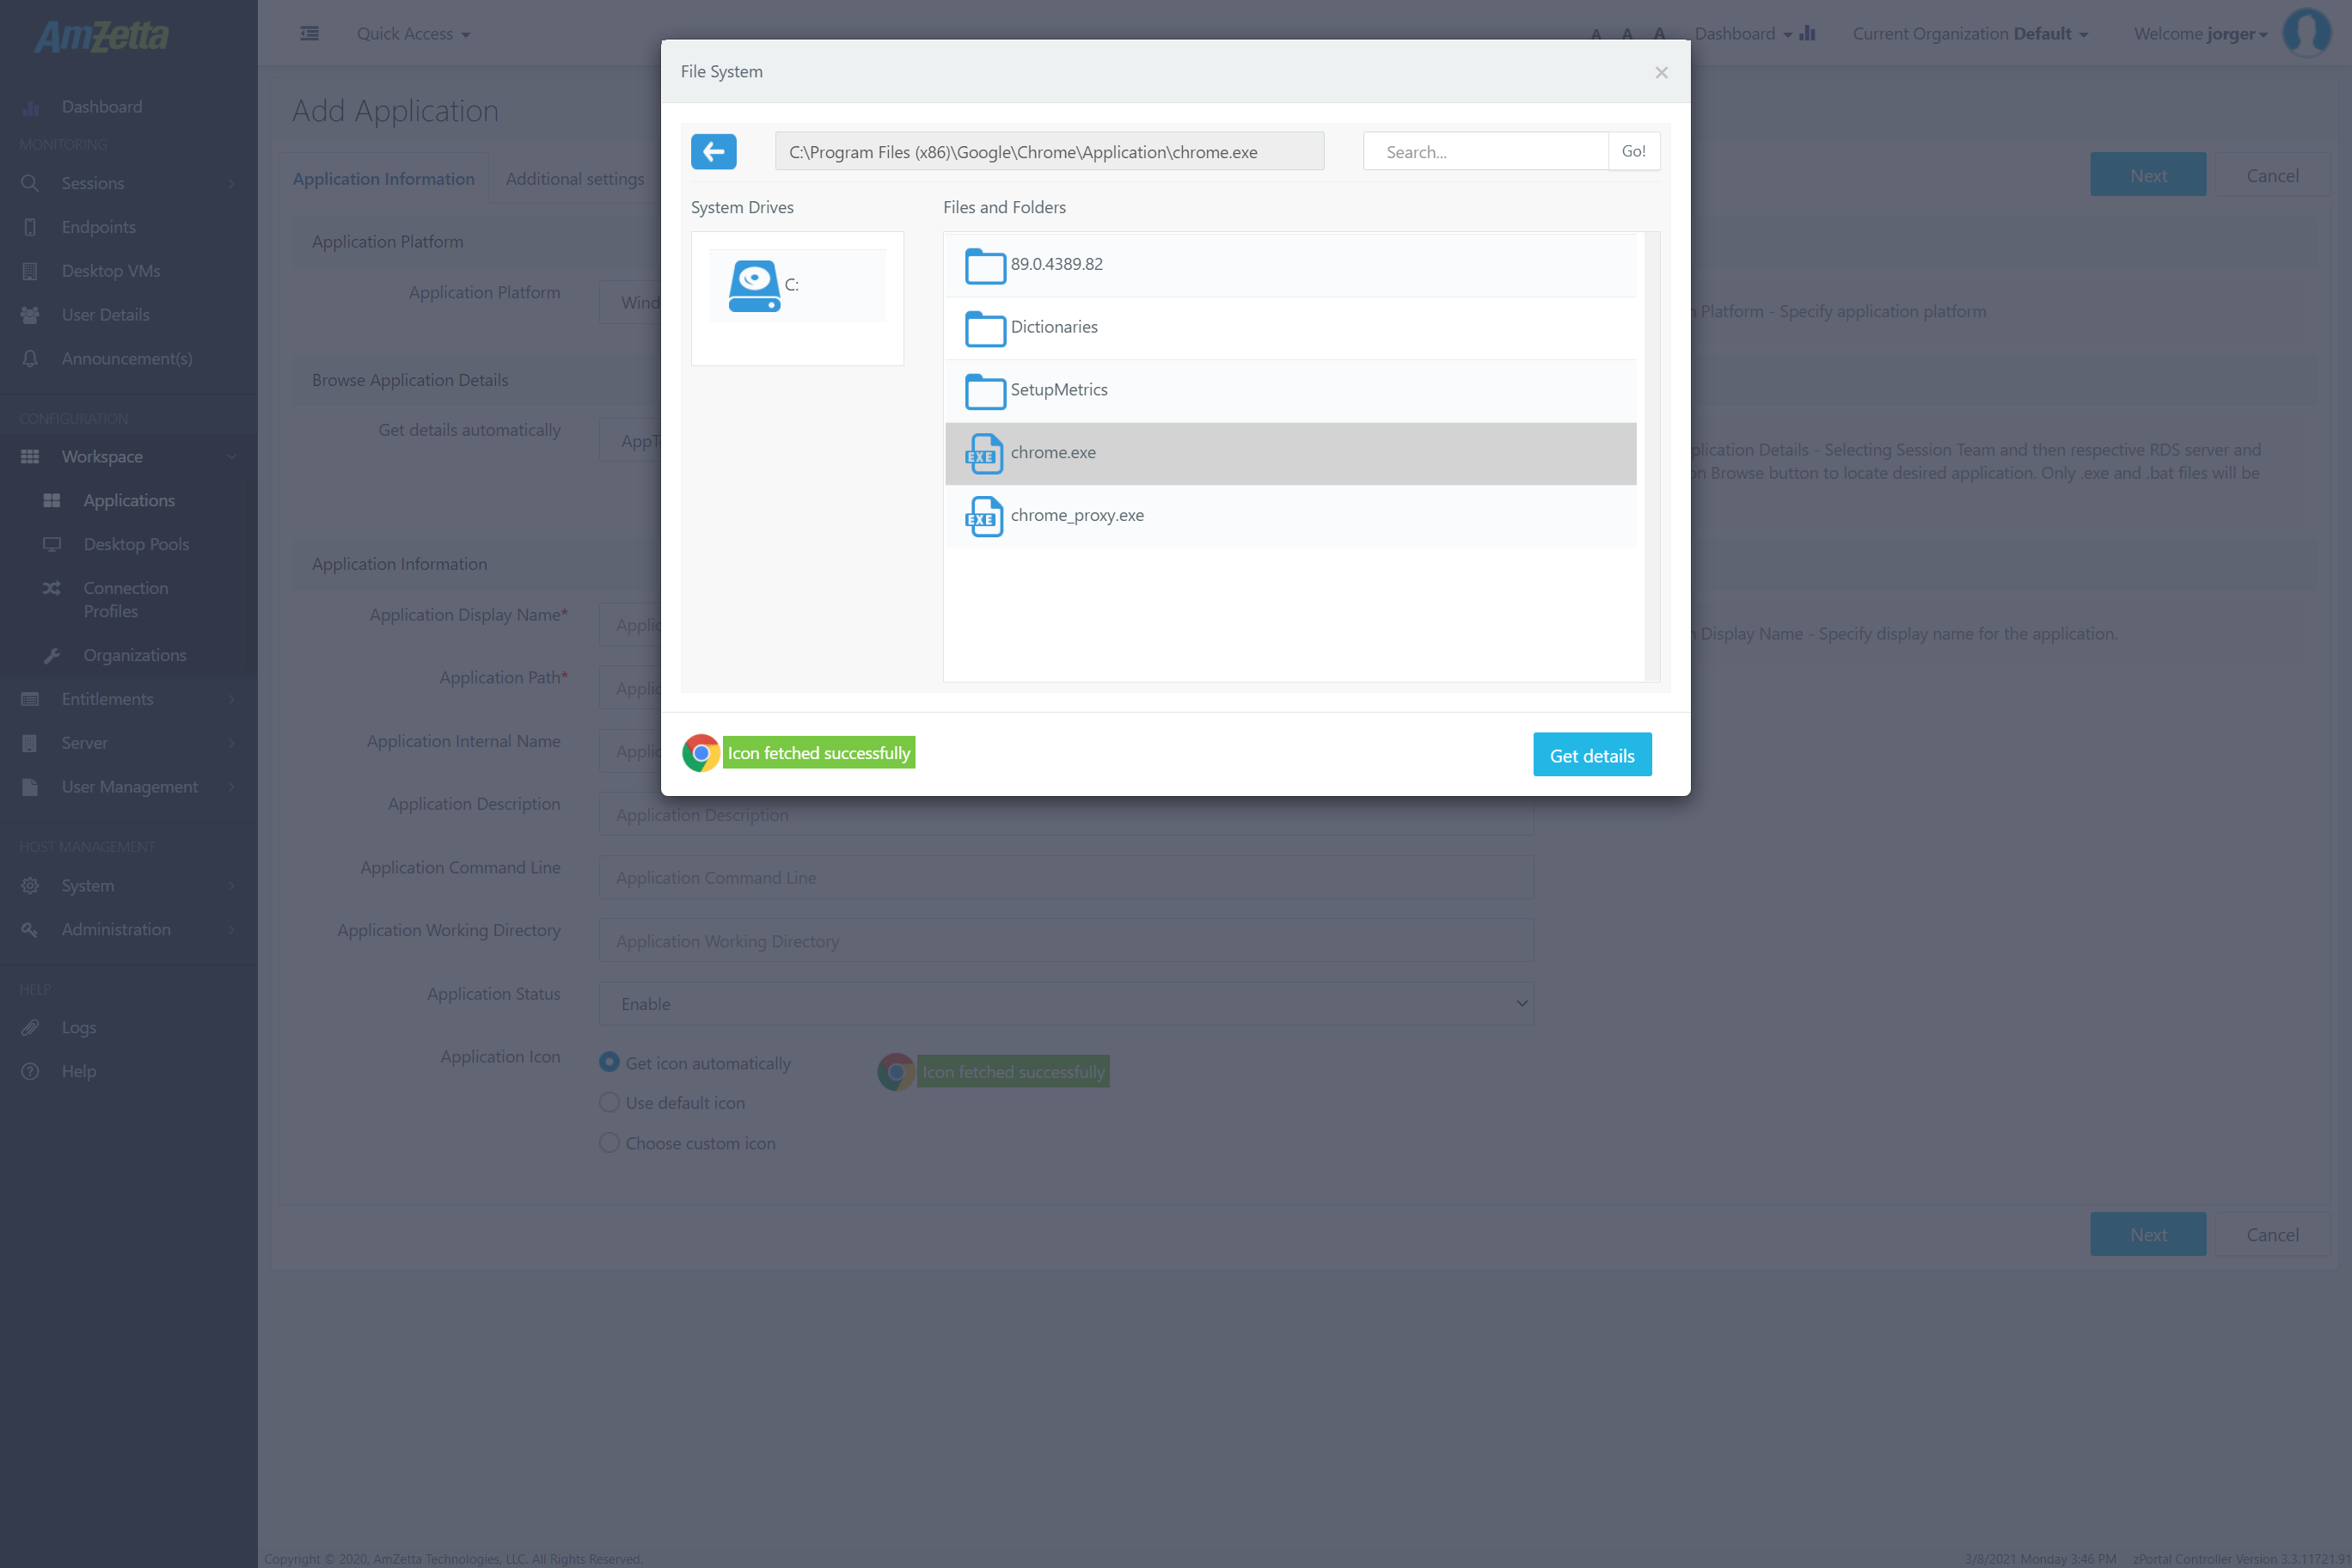
- Click on Get Details button to go back to Add Application wizard
- It will automatically fetch the icon and will show success message in the same dialog
- Application Path and Application Internal Name will get filled automatically
Get Application Details by Typing Full Application Path
An additional shortcut method is also available to get application details automatically, following steps can be used to get all the application details automatically:
- In Add Application wizard
- Type the full path of the exe in Application Path field
- Change the focus using tab or mouse click on some other field
- All the application details (Full Path/ Internal Name and Icon) will be fetched automatically
Server Selection for Applications Publishing
- The list of servers includes all the session host servers added in the current organization
- If the selected servers are members of session team, then while providing the application session, server will be selected as per load balancing mechanism
- If the selected servers do not belong to the same session team, then it won’t follow any load balancing mechanism and session can be given from any server
- If the Authorization server is built-in, then the session for the session will be provided from the session host server from which the user belongs to.
- While selecting a server which does not have the application installed, will be shown with a cross (X) and should not be selected.
- Selecting such server will continue to give application from the server and then may result in failed session when given from server.
Application Specific Connection Profile
In zPortal deployment, if any specific connection profile must be used for an application then that can be done by specifying the connection profile for the application.
Application specific connection profile takes priority only when
- When the access mode in connection profile is selected as Shell mode
- In case of Remote App mode, application specific connection profile will only be used if that application is the first from the specific session host server. If the application is accessed after invoking any other application, applying new connection profile, won’t be possible.
Connection profile for an application can be specified in Additional Settings section of Add or Edit Application wizard.

Using Folders to Categorize Application
Administrator can choose to categorize the application, as how they will be shown on client side using putting applications in a container referred as Folder.
Folders can be created or modified in Create Application or Edit Application wizard only. To create a new folder, select option Create New in Folder Information section and provide appropriate name for the folder.
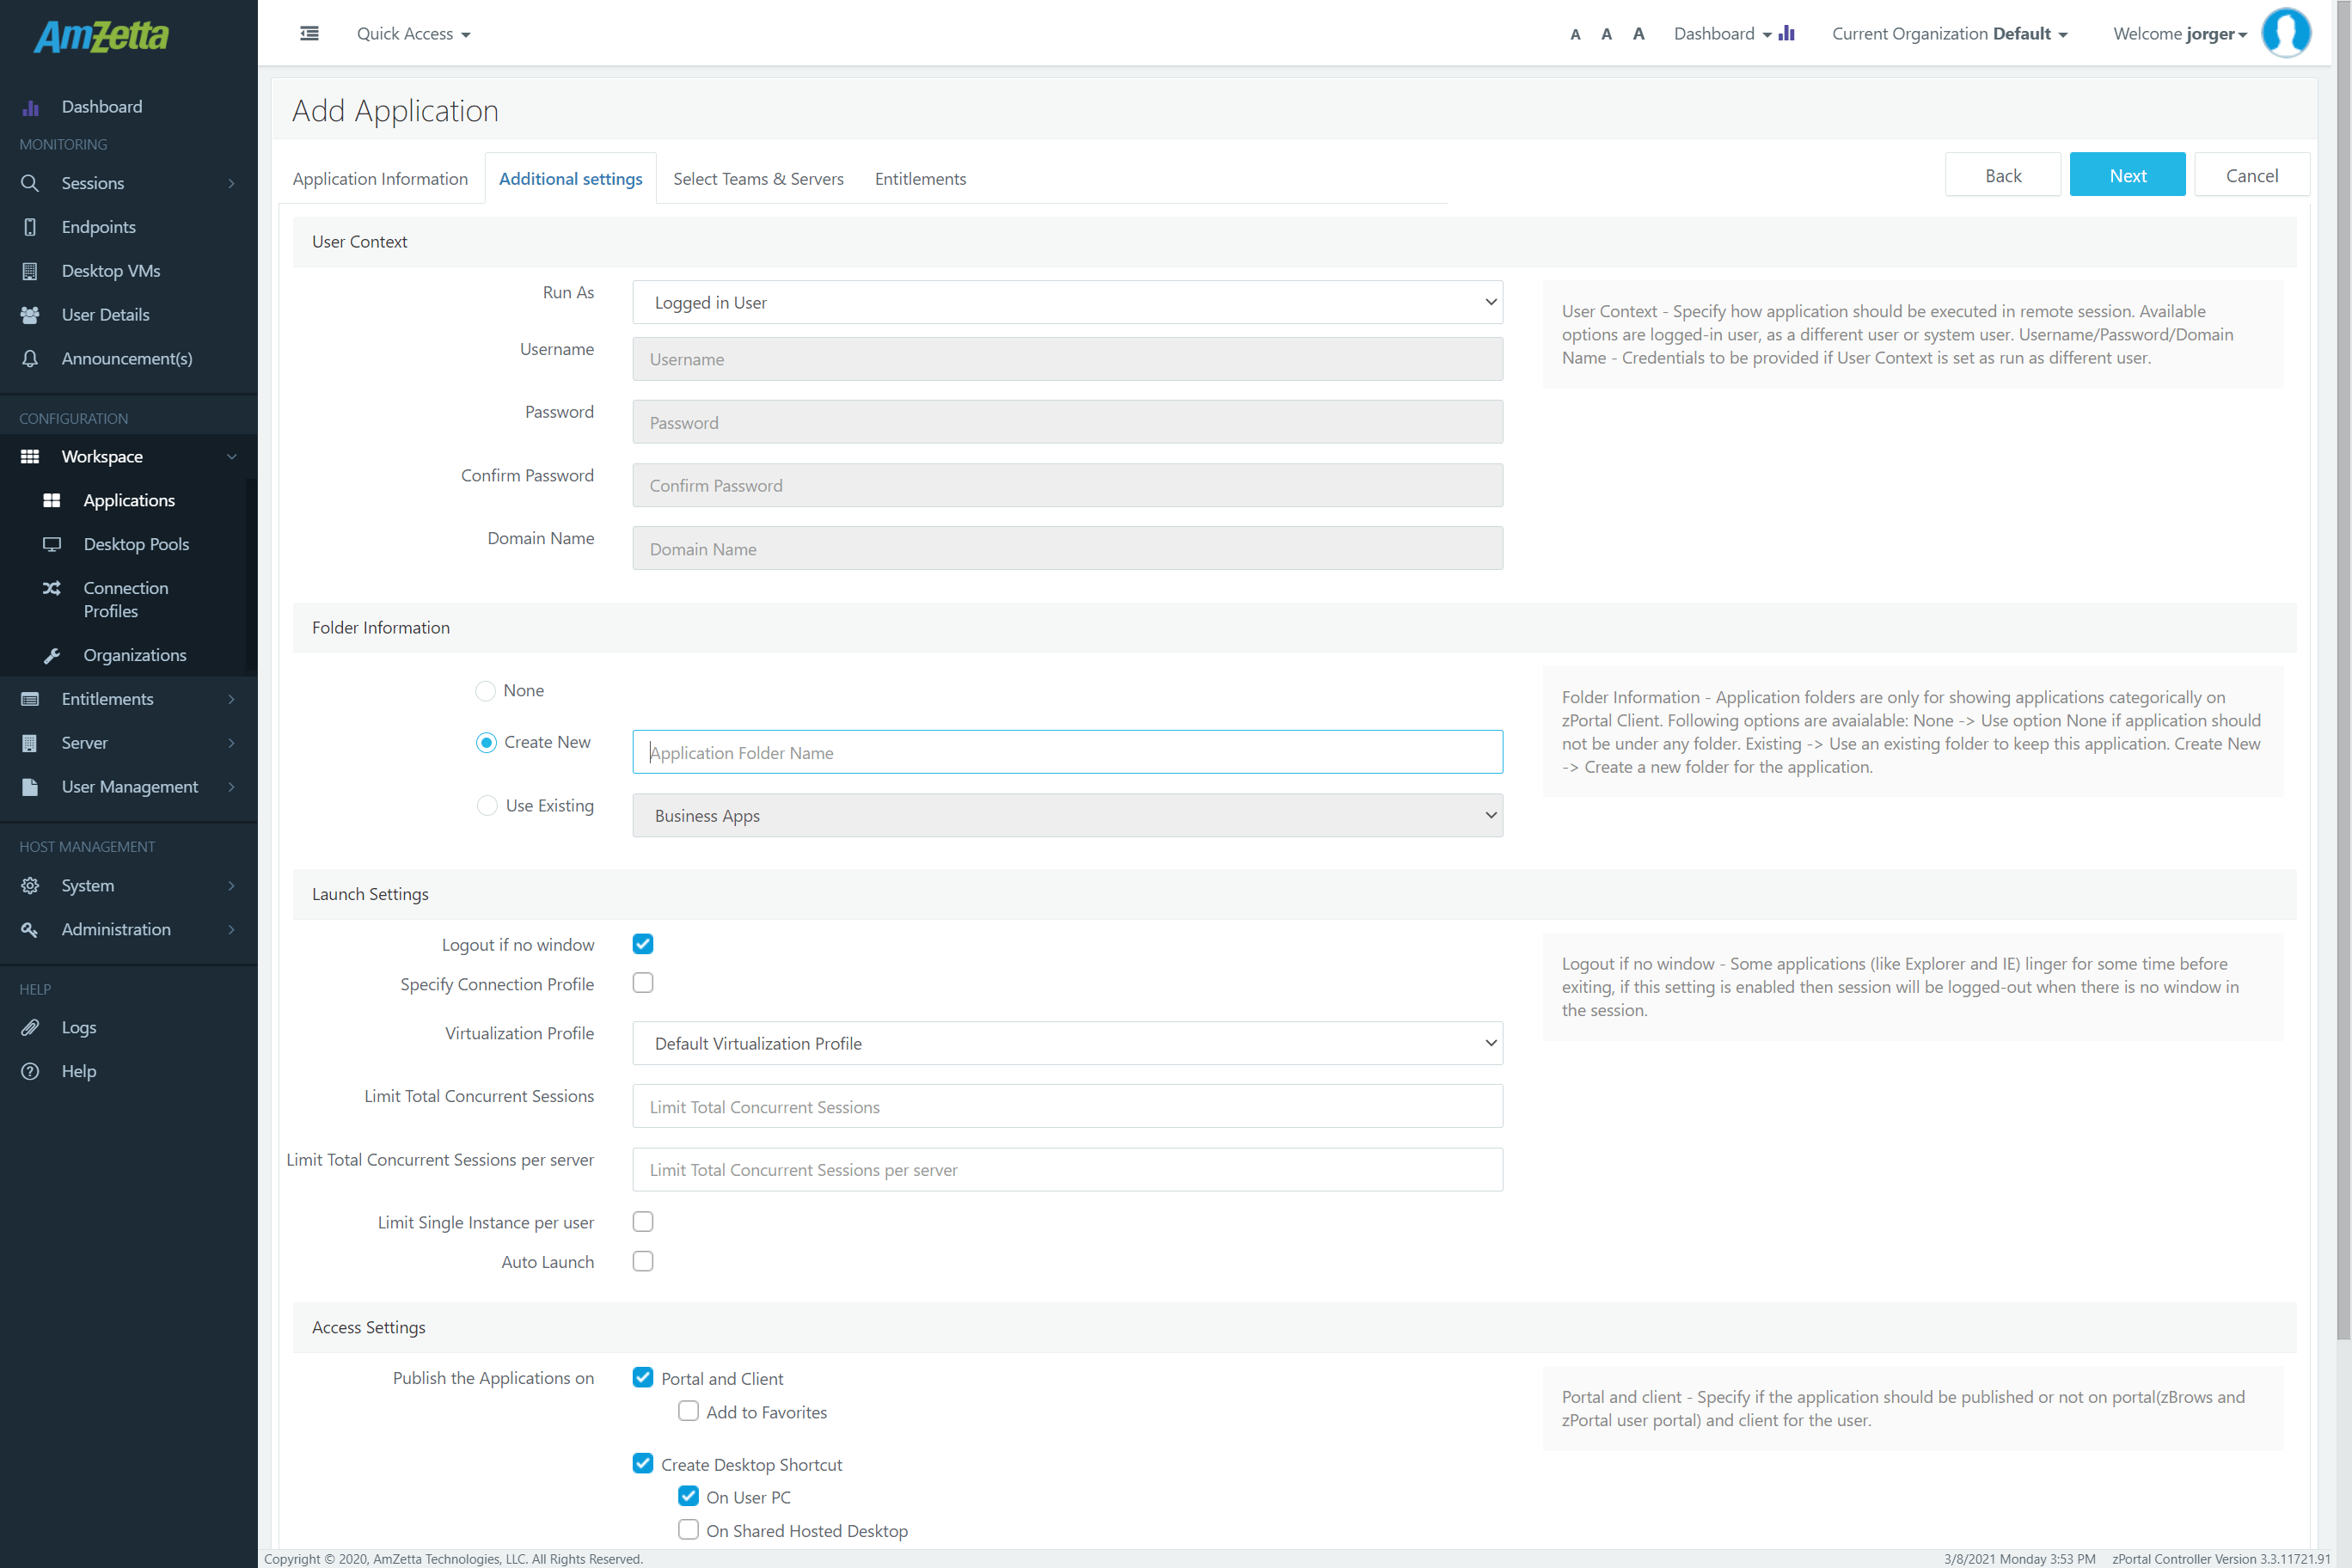
To use an existing folder, select option Use Existing, in Folder Information section in Additional Settings screen of Add or Edit Application wizard. All existing folder names will be displayed in dropdown list.
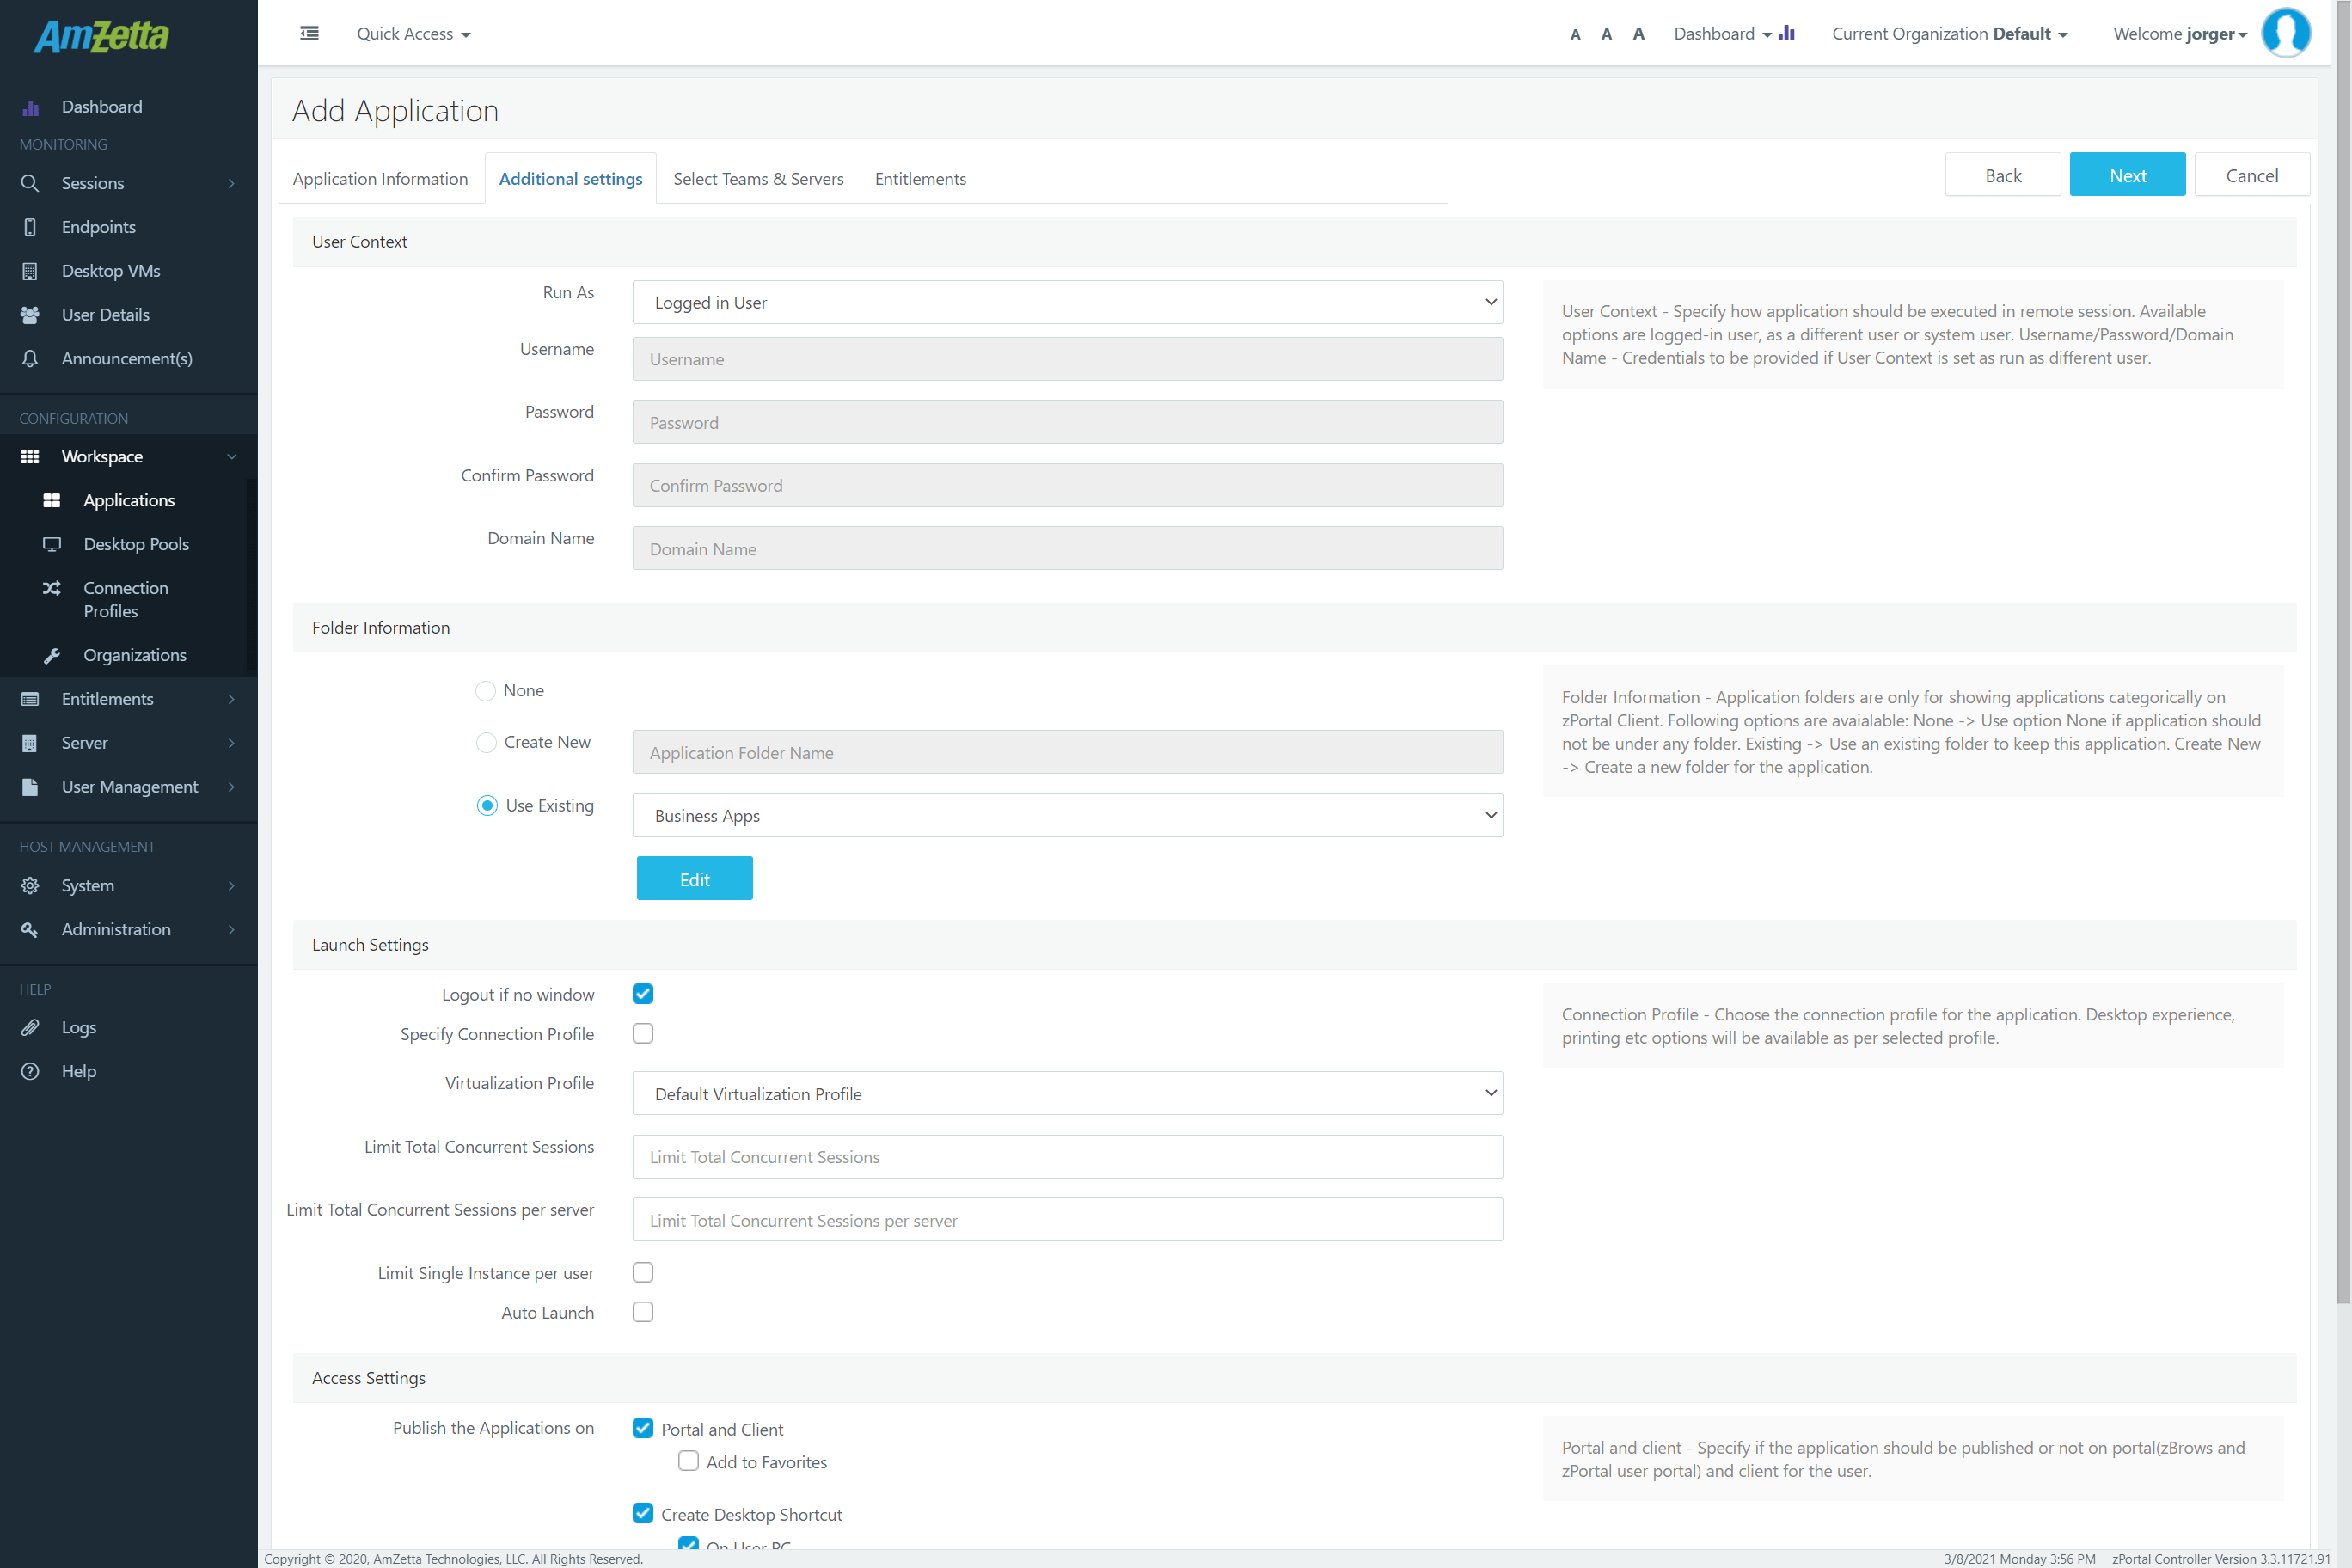
Administrator can choose to edit an existing folder by clicking on Edit button. The folder name will be modified with new folder name provided in Edit Folder wizard.
When user logs in from zPortal Client, the applications will be shown in respective folders only.
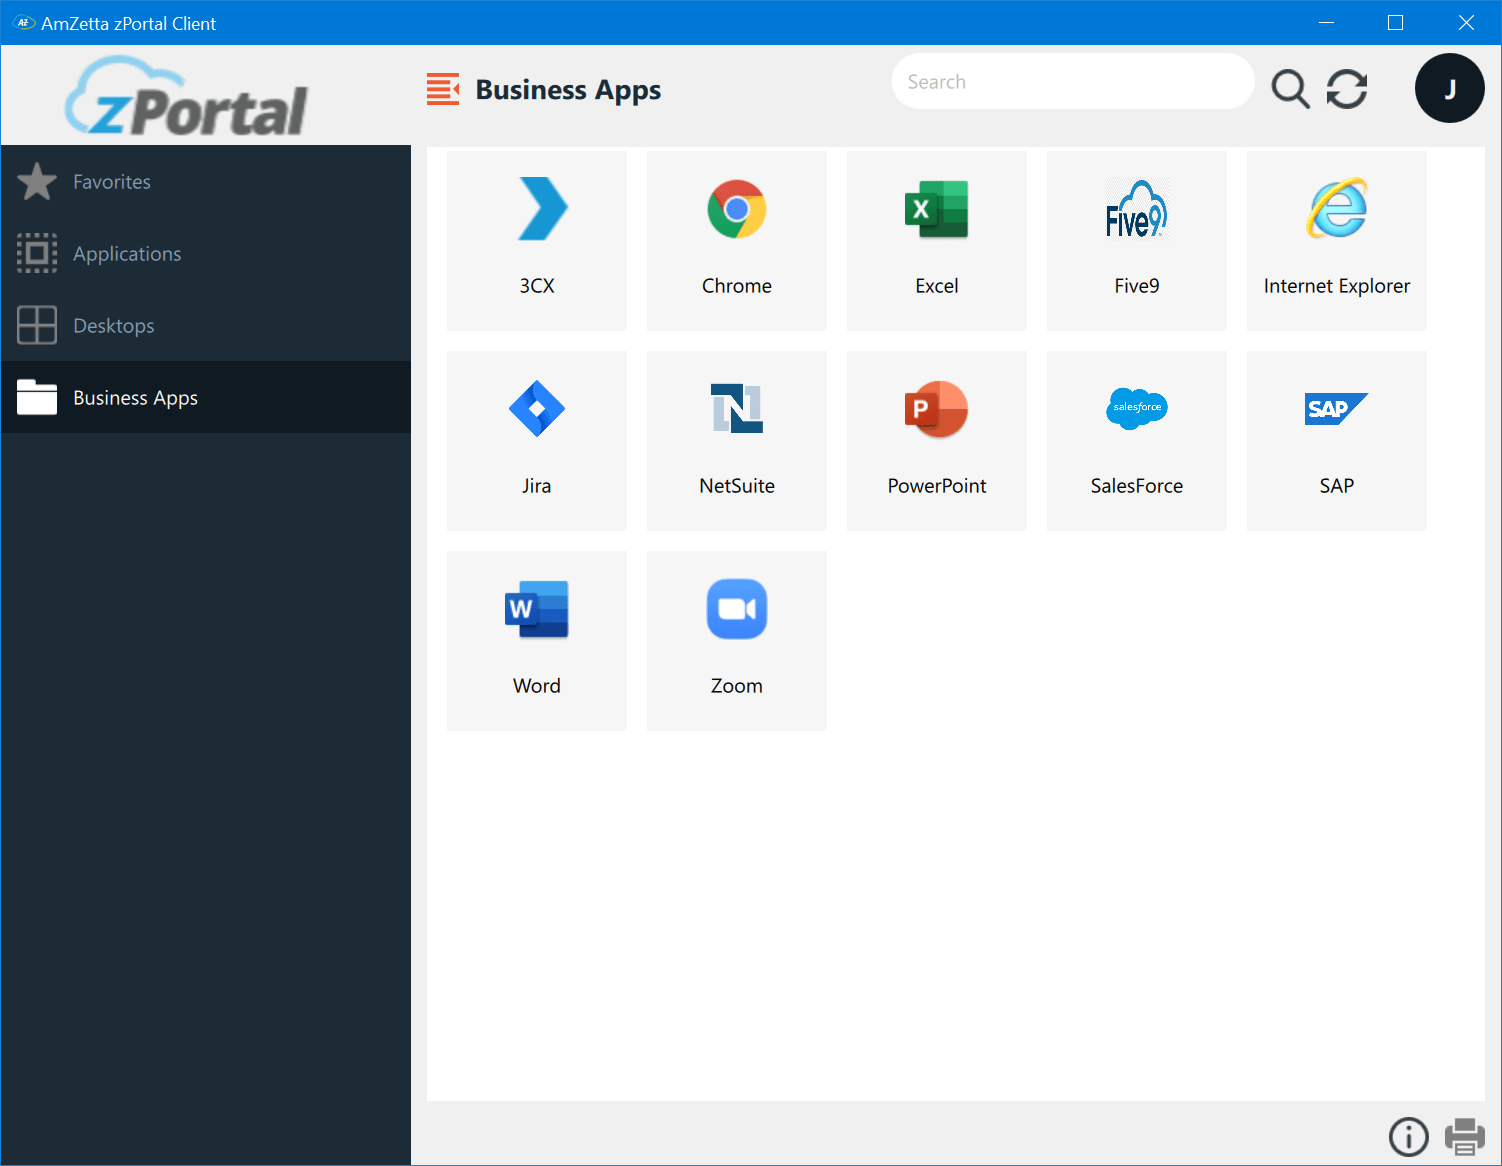
Please note, once created, folders cannot be deleted. However, applications can easily be moved out by selecting folder as None.