CA Certificate Import to Clients
Certificate Export
Export the certificate by clicking the Export button. The formats available are .crt and .der

Certificate Import
Windows
Manual Import
Import the certificate on each computer using the Certificate Manager (certmgr.msc) tool. The Certificate Manager tool (certmgr.msc) is a Microsoft Management Console (MMC) snap-in that provides a graphical user interface for managing digital certificates, certificate trust lists (CTLs), and certificate revocation lists (CRLs)
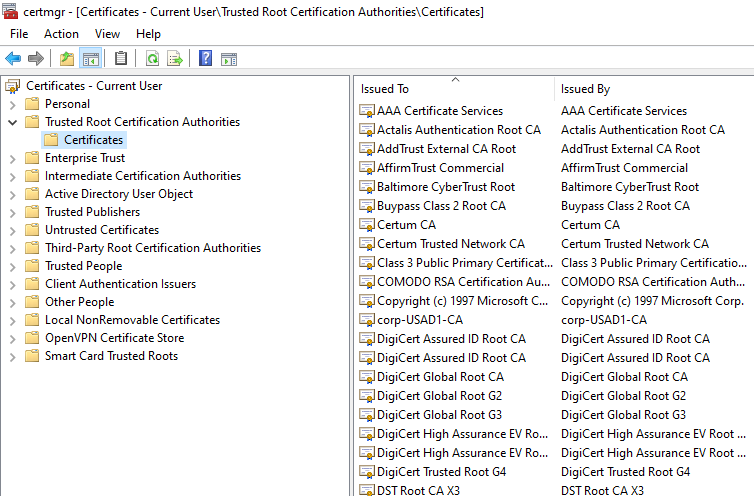
Right-click the target certificate store (e.g., Trusted Root Certification Authorities) and select "Import", and follow the Wizard.
Group Import
To distribute certificates to multiple Windows computers simultaneously, the most effective method is to use Group Policy. This approach enables certificate deployment across a domain by importing them into the appropriate certificate store on each managed device.
Steps to distribute certificates using Group Policy:
- Open Group Policy Management:
- On your domain controller, open the Run dialog (Win + R) and type gpmc.msc to open the Group Policy Management Console.
NOTE: To perform this procedure, you must be a member of the Domain Admins group or the Enterprise Admins group in Active Directory or you must have been delegated the appropriate authority.
- Create or modify a Group Policy Object (GPO):
- Navigate to your domain in the left-hand pane.
- You can either edit an existing GPO that is already linked to the target computers or create a new one. To create a new GPO, right-click on the Organizational Unit (OU) containing the computers you want to target and select Create a GPO in this domain, and Link it here.... Give it a descriptive name like "Certificate Deployment."
Navigate to the target domain, right-click, and choose "Create a GPO in this domain and link it here".
- Edit the GPO:
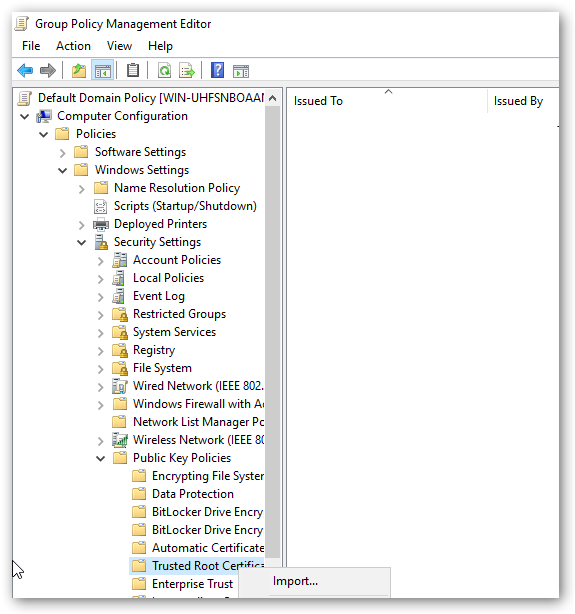
- Right-click the GPO you just created and select Edit. This will open the Group Policy Management Editor.
- Navigate to the Certificate Store:
- In the GPO Editor, navigate to the following path in the left pane:
Computer Configuration > Policies > Windows Settings > Security Settings > Public Key Policies
- Select the certificate store that is appropriate for your certificate. Example : Trusted Root Certification Authorities: For a root CA certificate.
- In the GPO Editor, navigate to the following path in the left pane:
- Import the Certificate
- Right-click on the chosen certificate store (e.g., Trusted Root Certification Authorities).
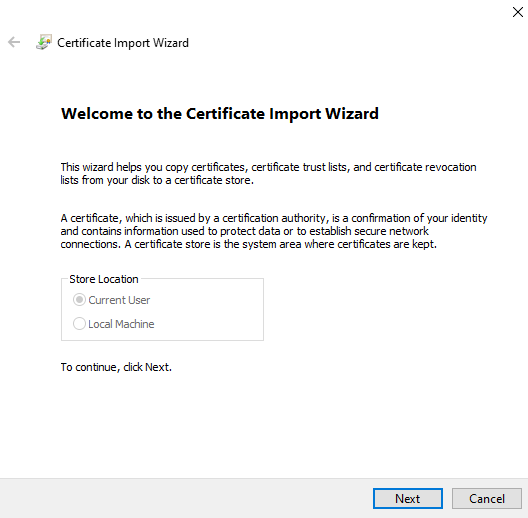
- Select Import.... This will launch the Certificate Import Wizard.
- Click Next and browse to the location of your certificate file (.cer, .crt, or .pfx).
- Follow the rest of the wizard, accepting the default settings. Ensure that the wizard confirms the certificate will be placed in the correct store.
- Click Finish to complete the import.
- Apply the Policy to Clients:
- The GPO is now configured. The settings will be applied to the targeted computers the next time they refresh their Group Policy.
- To force an immediate update on a client machine for testing purposes, open a Command Prompt as an administrator and run the command: gpupdate /force.
The certificate will be automatically installed in the correct store on all computers under the scope of this GPO.
You can also use the reference guide from the official Microsoft documentation
Linux
Manual Import
Importing the Certificate Authority (CA) into Local CA Certificate Store
Copy the CA certificate to the system trust store: The standard location for a local CA on a Debian-based system like Ubuntu is /usr/local/share/ca-certificates/. Copy your ca.crt file to this directory. Make sure the file has a .crt extension.
cp zguardian.crt /usr/local/share/ca-certificates/zguardian.crtUpdate the system's trust store: Run the update-ca-certificates command. This command will integrate your new CA certificate into the system's trust bundle.
update-ca-certificatesYou should see output similar to this, indicating that your new certificate has been added:
Updating certificates in /etc/ssl/certs...
1 added, 0 removed; done.
Running hooks in /etc/ca-certificates/update.d...
...done.
Group Import
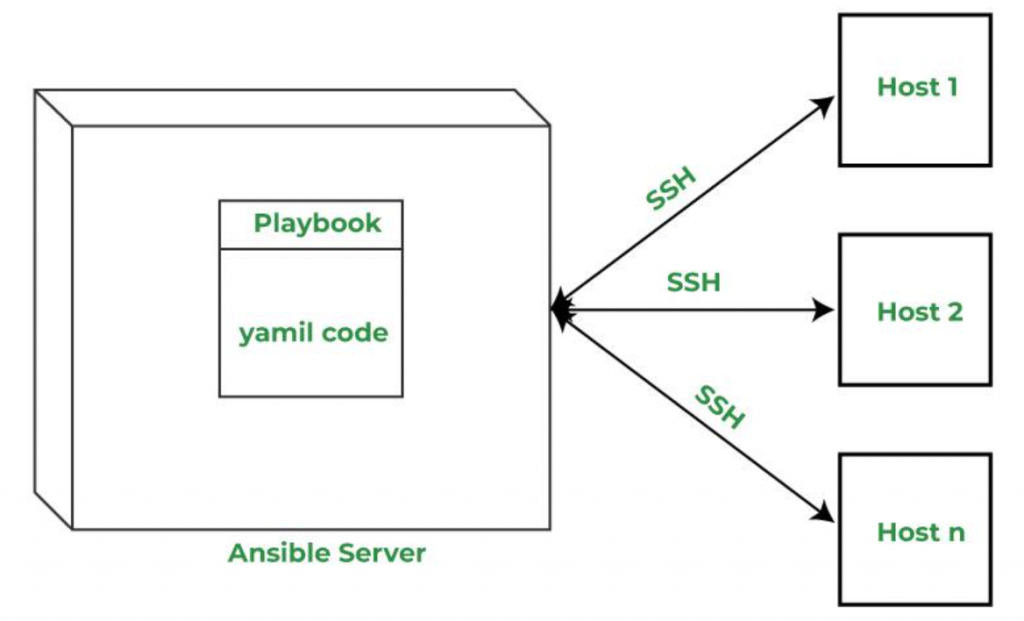
To deploy CA certificates to multiple Linux clients in a LAN, use an automation tool like Ansible.
- Steps to deploy CA Certificates:
- Install Ansible on a control machine. Ansible should be installed only on the admin/control machine, not on the target Linux clients.
sudo apt update sudo apt install ansible –y - Define an inventory of target Linux hosts (e.g., inventory.ini).
- Ansible connects to each target machine using SSH, so need a list of IPs or hostnames of all the client systems that wants to be configured. Here is the example file.
- Create inventory.ini file:
[linux_clients] 192.168.1.101 192.168.1.102 192.168.1.103 - The IP’s can group hosts using headers like [linux_clients], which are referenced in playbook.
- NOTE :
- SSH access is allowed to each machine.
- SSH keys are set up (recommended), or passwords are available.
- Each machine allows sudo (required for installing the certificate).
- Use the following playbook to deploy the certificate:
## deploy-ca-cert.yml --- - name: Deploy CA certificate to Linux clients hosts: linux_clients # Define LAN group in inventory become: yes tasks: - name: Copy CA certificate to trust store copy: src: zguardian.crt dest: /usr/local/share/ca-certificates/zguardian.crt owner: root group: root mode: '0644' - name: Update CA trust store command: update-ca-certificates - Place the following files in the same working directory on the control machine
- inventory.ini # List of target Linux hosts
- deploy-cert.yml # Ansible playbook
- zguardian.crt # CA certificate to be deployed
- Then execute the playbook with the following command to deploy the zguardian.crt to all Linux machines.
ansible-playbook -i inventory.ini deploy-cert.yml - verify the certificate installation on each target machine using:
openssl verify -CAfile /etc/ssl/certs/ca-certificates.crt zguardian.crt
- Install Ansible on a control machine. Ansible should be installed only on the admin/control machine, not on the target Linux clients.
- This is the pictorial respresentation of an ANSIBLE METHOD
macOS
Manual Import
Method 1: Using the Keychain Access Utility
- Locate the .crt or .der file in Finder.
- Double-click the file. Keychain Access will open.
- A dialog will appear asking you to choose a keychain to import the certificate into.
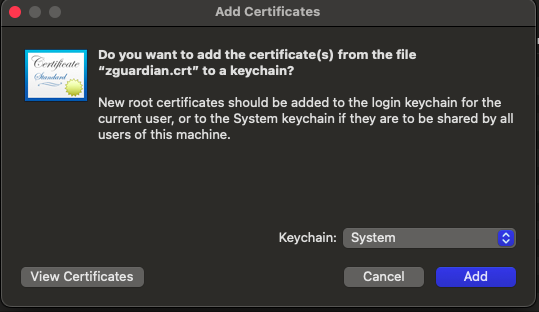
- Select the keychain (eg Login, System) and click Add.
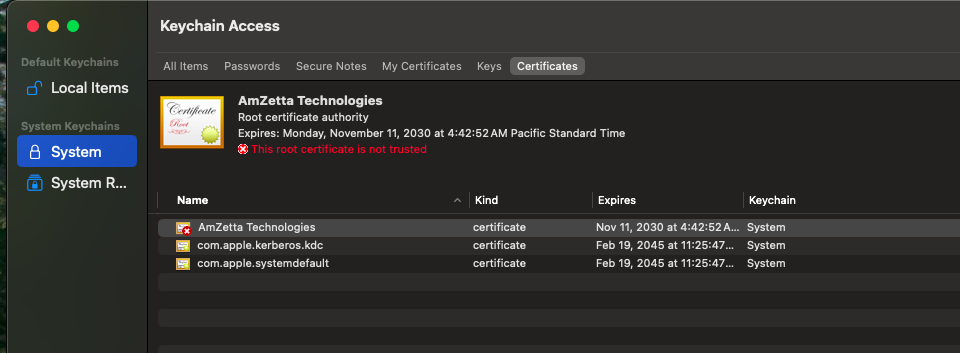
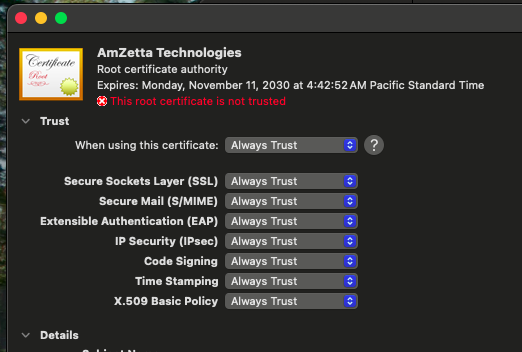
- Double click the certificate to open the details and expand Trust.
- Change When Using this Certificate from Use System Defaults to Always Trust.
- To ensure that all applications recognize the new certificate, restart the client device.

Method 2: Drag and Drop
- Open the Keychain Access application (found in Applications/Utilities).
- Select the desired keychain in the left sidebar.
- Drag and drop the .crt or .der file directly into the Keychain Access window.
- Double click the certificate to open the details and expand Trust.
- Change When Using this Certificate from Use System Defaults to Always Trust.
- To ensure that all applications recognize the new certificate, restart the client device.
Note: Certificates added to the Login keychain are only available to the currently logged in user. The System keychain applies to all users.
Group Import
Certificates can be distributed to multiple macOS computers through manual methods or, for greater efficiency and security, using a Mobile Device Management (MDM) solution.
Method 1: Distributing Certificates via MDM (Recommended)
An MDM solution allows you to centrally manage and push certificates to your fleet of Macs. This method ensures consistency and is the standard for corporate environments.
- Step 1: Create a Configuration Profile
- Log in to your MDM console.
- Navigate to the configuration profile section and create a new profile specifically for CA certificate installation.
- Add a "Certificates" payload to the profile.
- Step 2: Upload and Deploy the Certificate
- Within the Certificates payload, upload your .pem or .cer certificate file. (The .crt file extension can be changed by just renaming the file to .pem)
- Specify the certificate's trust level
- Assign the configuration profile to the target Mac computers or user groups.
- The MDM will automatically push the certificate to the devices, which will then install it in the appropriate keychain.
- Once the profile is pushed, verify that the certificate is installed and trusted on the devices
iOS
Manual Import
- Step 1: Send the CA Certificate via Email
- Use any email service (e.g., Outlook, Gmail) to send the CA certificate file to an email address accessible on the iOS device.
- Attach the certificate file to the email and send it.
- Step 2: Open the Email on the iOS Device
- Open the Mail app on the iOS device.
- Locate and open the email containing the CA certificate attachment.
- Step 3: Download the CA Certificate
- Tap the attached certificate file in the email.
- A prompt will appear: “This website is trying to download a configuration profile. Do you want to allow this?”
- Tap Allow to begin the download.
- Step 4: Open Settings to Install Profile
- After downloading, a message will appear: “Profile Downloaded – Review the profile in Settings if you want to install it.”
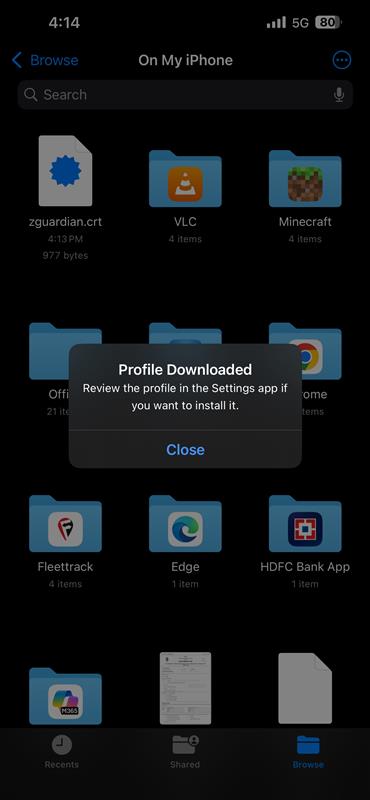
- Open the Settings app.
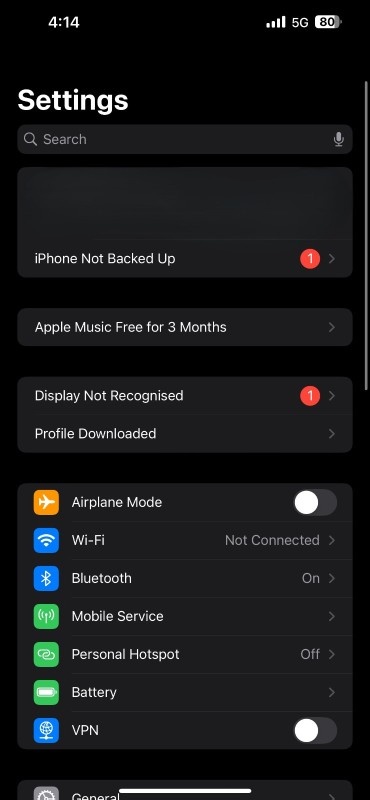
- Tap Profile Downloaded (at the top of the main Settings screen).
- Step 5: Install the Certificate Profile
- Review the profile information, then tap Install.
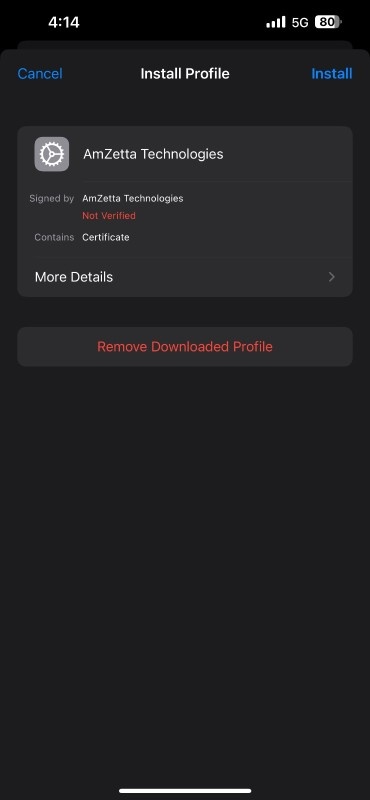
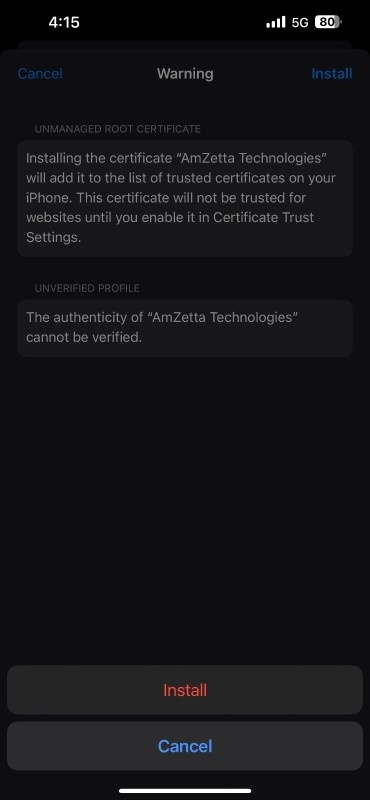
- If prompted, enter the device passcode.
- After the installation of profile, tap "Done".
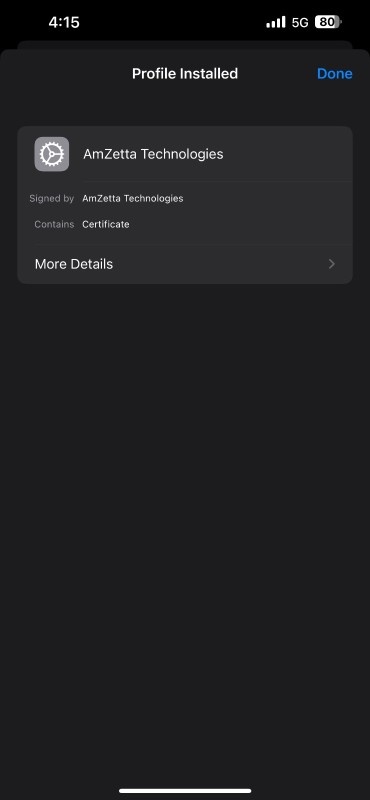
- Confirm the installation by tapping Install again.
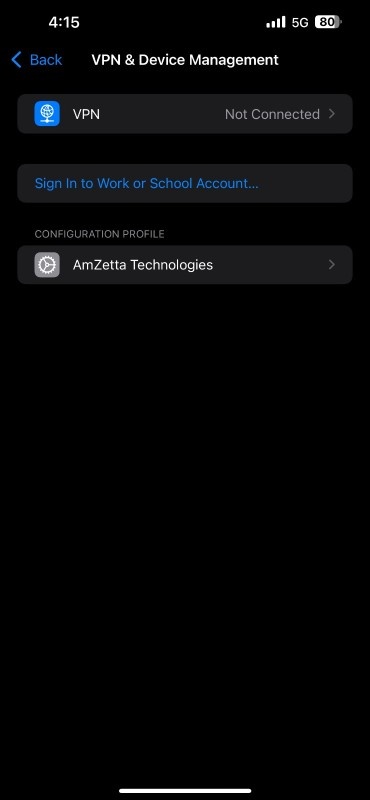
- Step 6: Verify Installation in VPN & Device Management
- Go to Settings > General > VPN & Device Management
- Under Configuration Profile, verify that the certificate has been installed.
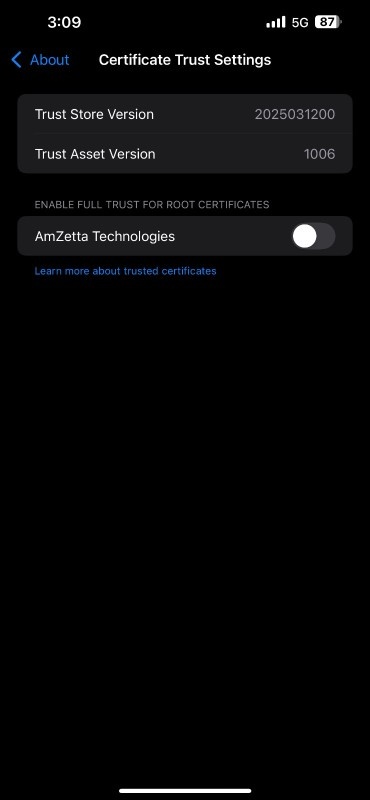
- Step 7: Trust the Certificate
- After installation, go to: Settings > General > About > Certificate Trust Settings
- Under Enable Full Trust for Root Certificates, locate your imported CA certificate.
- Toggle the switch to enable trust for the certificate.
https://support.n4l.co.nz/s/article/Installing-an-SSL-Certificate-on-an-iOS-Device-Manually
Android
Manual Import
- Step 1: Send the CA Certificate to the Android Device
- Use any of the methods,
- Email (Gmail, Outlook)
- Google Drive
- USB transfer
- Bluetooth
- File-sharing apps (e.g., ShareIt, Telegram, WhatsApp)
to send the CA certificate file to the Android device.
- Use any of the methods,
- Step 2: Download and Save the Certificate
- Open the email or app where the certificate sent or uploaded the certificate.
- Tap the certificate file (.crt or .cer) to download it.
- The file will be saved to the Downloads folder or chosen directory.
- It can be accessed using the Files app or My Files app (depending on the phone brand).
- Step 3: Rename the Certificate File (if needed)
- Android often requires the certificate file to use the .crt or .cer extension.
- If it was saved as .pem, rename it to .crt or .cer.
- Step 4: Install the Certificate
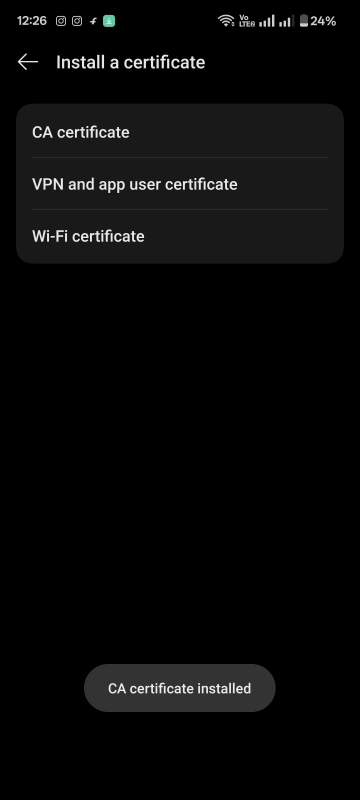
- Go to: Settings > Security & Privacy > More security & privacy > Credential Storage > Install a certificate > CA Certificate
- On some phones, this path may vary slightly:
- Settings > Security > Credential Storage > Install from storage
- Settings > Biometrics & Security > Other Security Settings > Install from device storage
- Tap the Settings icon on the home screen or app drawer, and scroll down to select Security & Privacy from the menu.
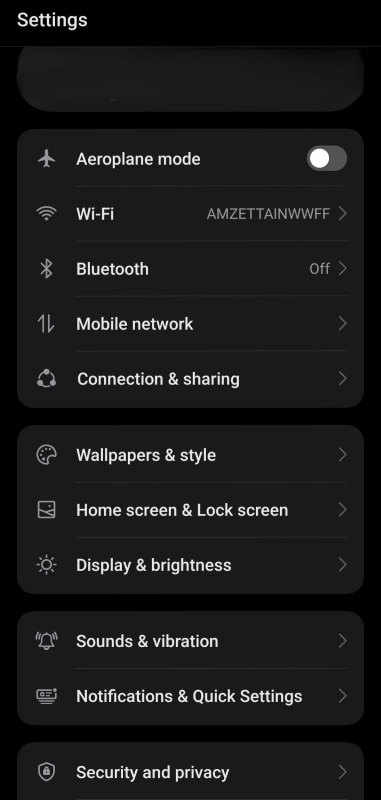
- Scroll down to tap on More security & privacy.

- Scroll to find and tap on Credential Storage in More security and privacy page.
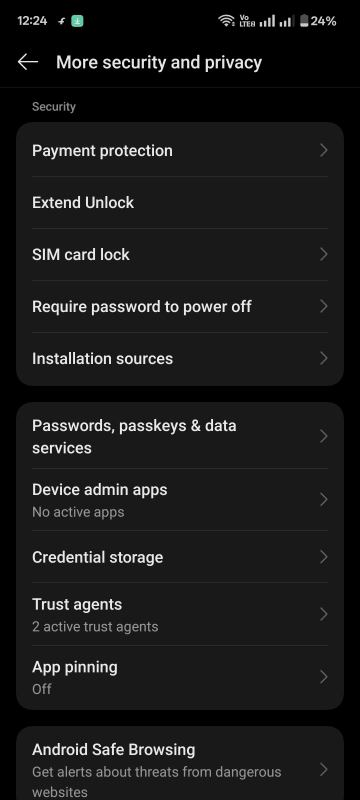
- Tap on CA Certificate to install a certificate from a local storage.

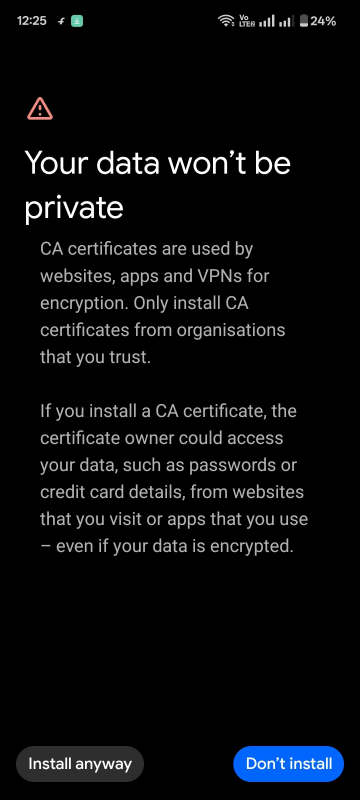
- Accept the warning (about device security) and click install anyway.
- Select the certificate file that is downloaded from the path where it's stored in android device.
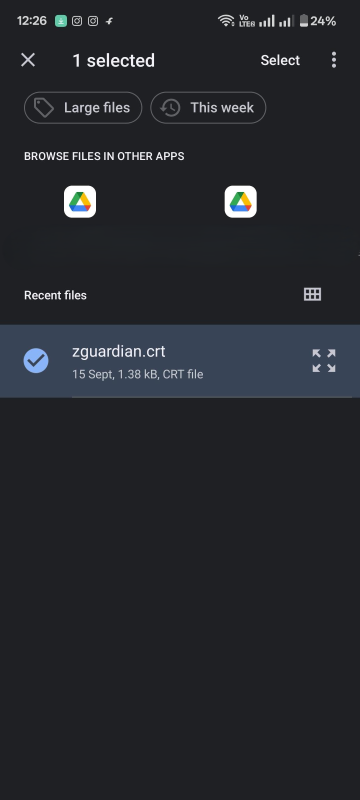
- Tap Select and some phones may be asked to name the certificate — enter a descriptive name (e.g., My Root CA).
- Tap OK / Install, Then certificate installed message will be poped out.
- Step 5: Confirm Certificate Installation
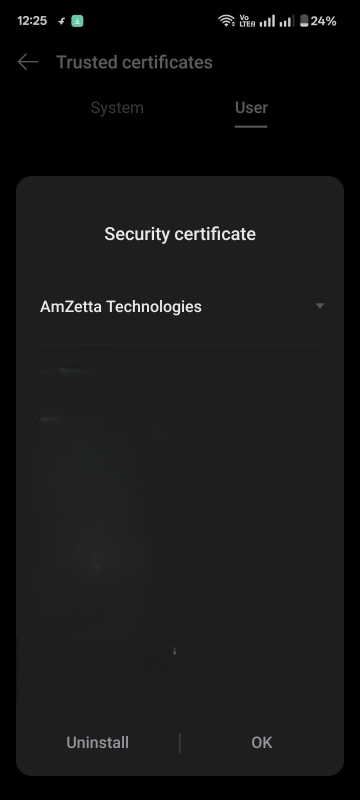
- Go to: Settings > Security > More security settings > Trusted Credentials and tap User tab, Installed CA certificate will be listed out in this area.

- If the listed certificate is taped, then the details of that certificate will be displayed.
https://support.n4l.co.nz/s/article/Installing-an-SSL-Certificate-on-an-Android-Device-Manually
Firefox
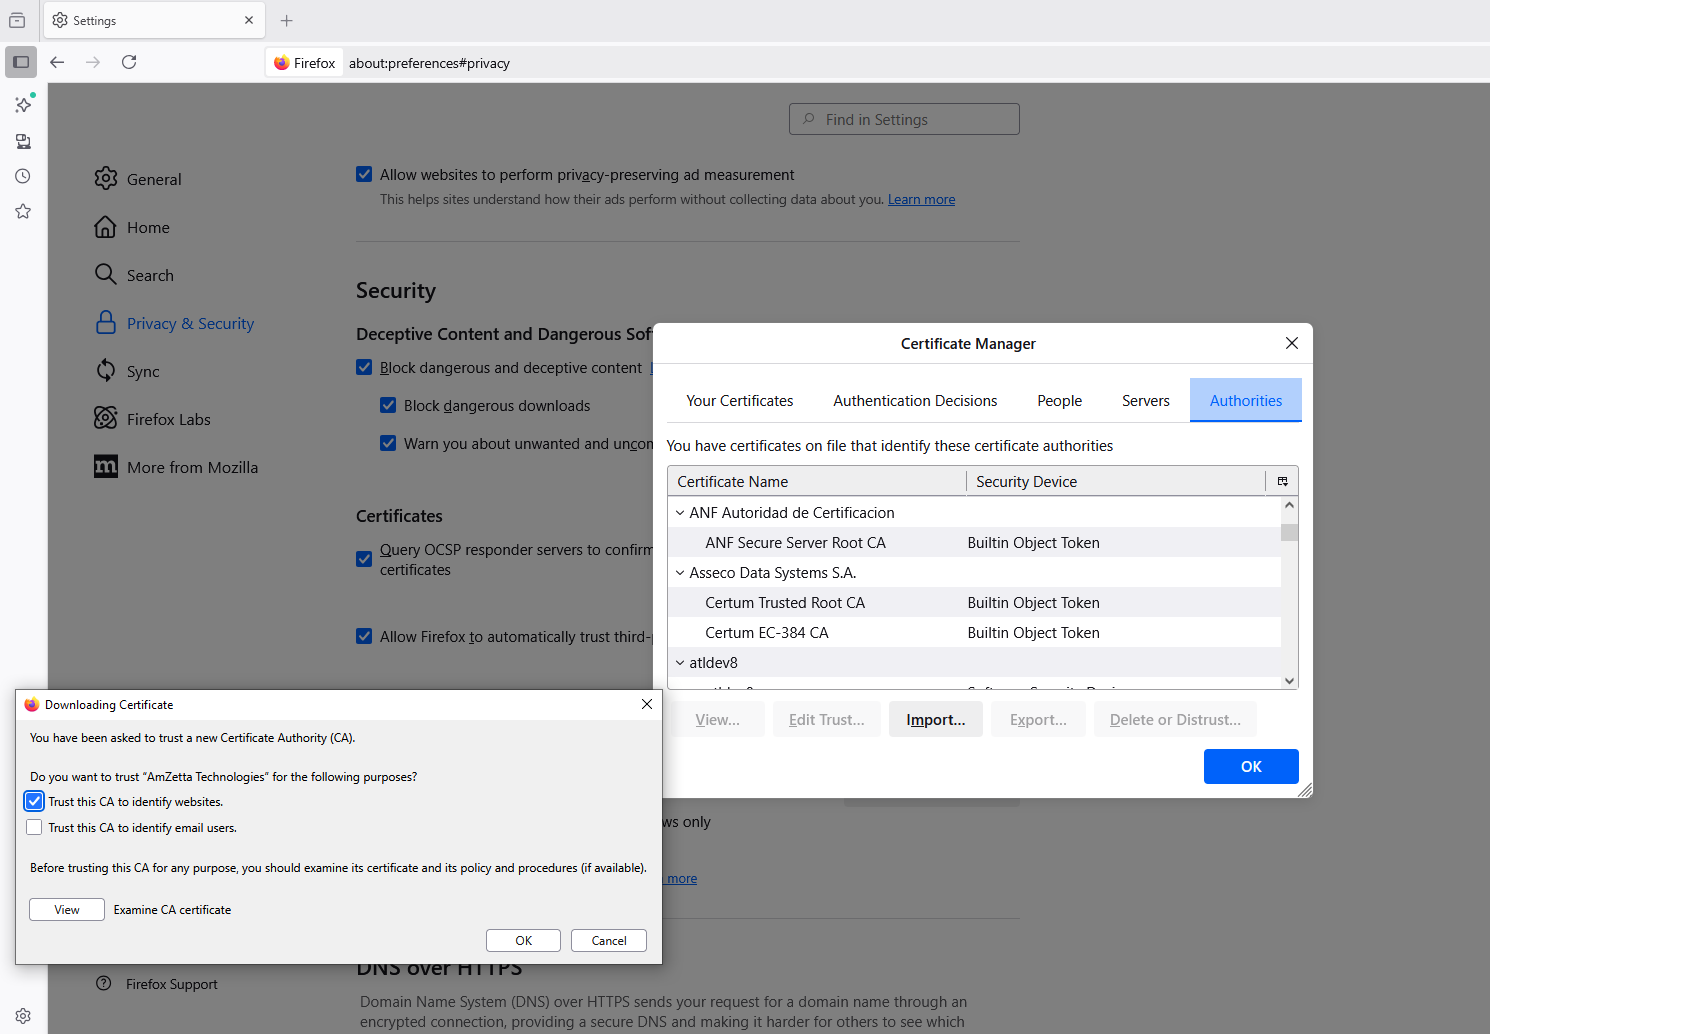
Firefox has its own certificate store. To avoid errors in Firefox, the certificate must be installed in this store, rather than in the OS.
- In Firefox, go to Options > Privacy & Security (Windows) or Preferences > Privacy & Security (macOS).
- Scroll down to the Certificates section. Select View Certificates, select the Authorities list. Import the certificate and set it to be trusted for website identification.
https://support.mozilla.org/en-US/kb/setting-certificate-authorities-firefox